Preparing Your Home for Winter: Essential Tips for Cold Weather

Protect Your Home From Winter Water Damage

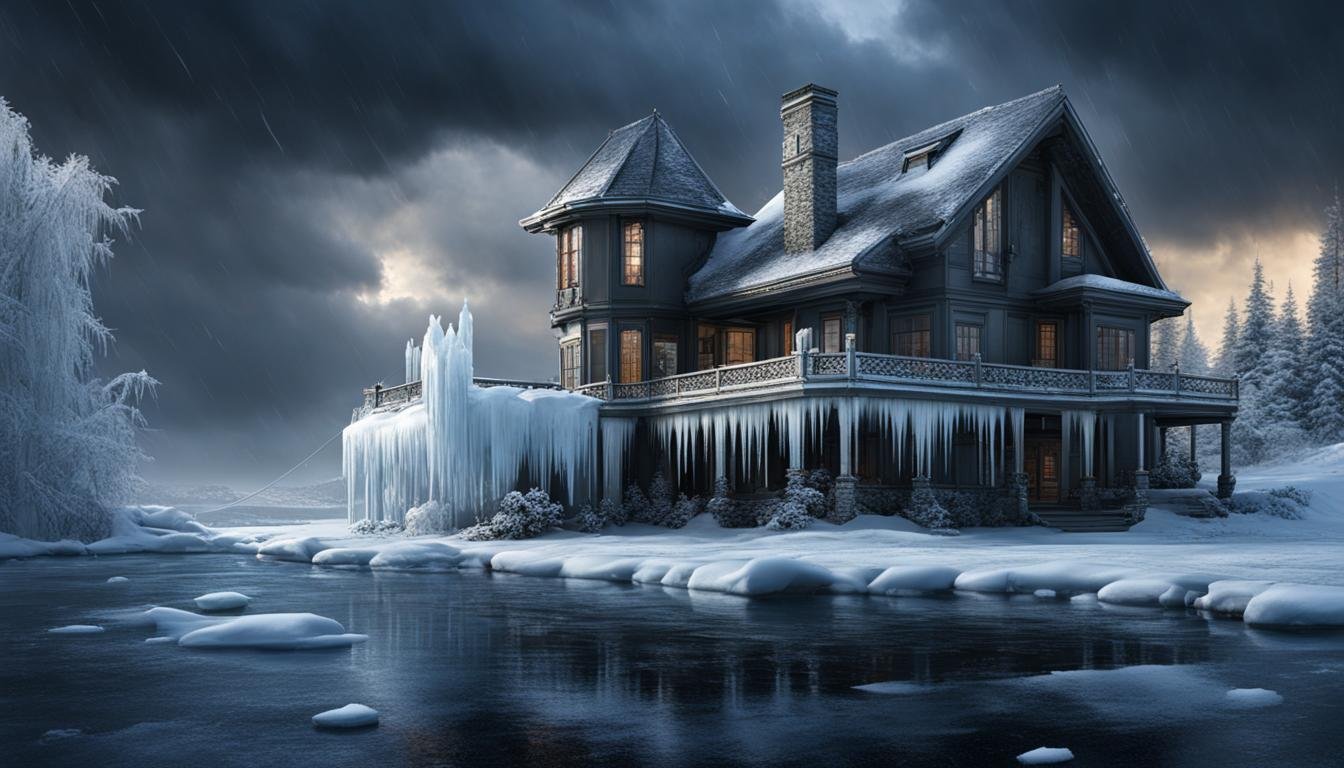
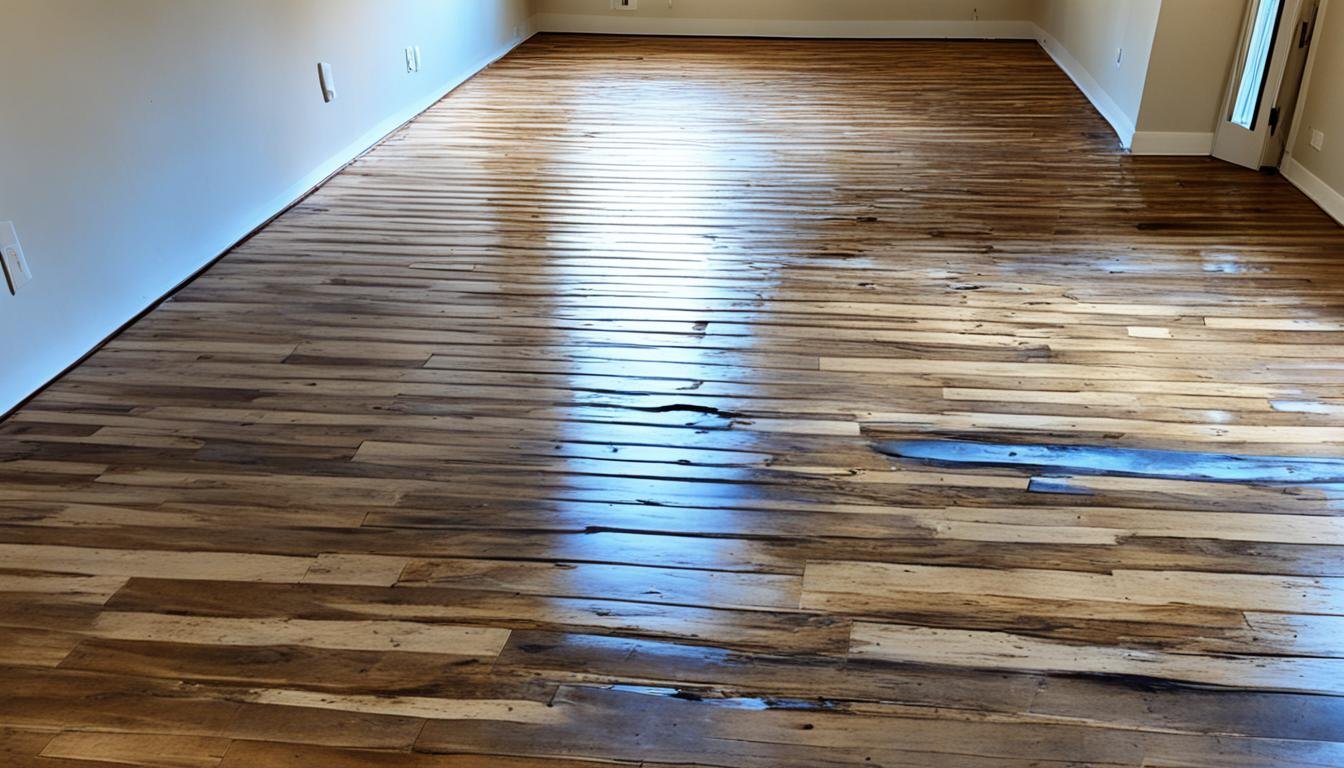
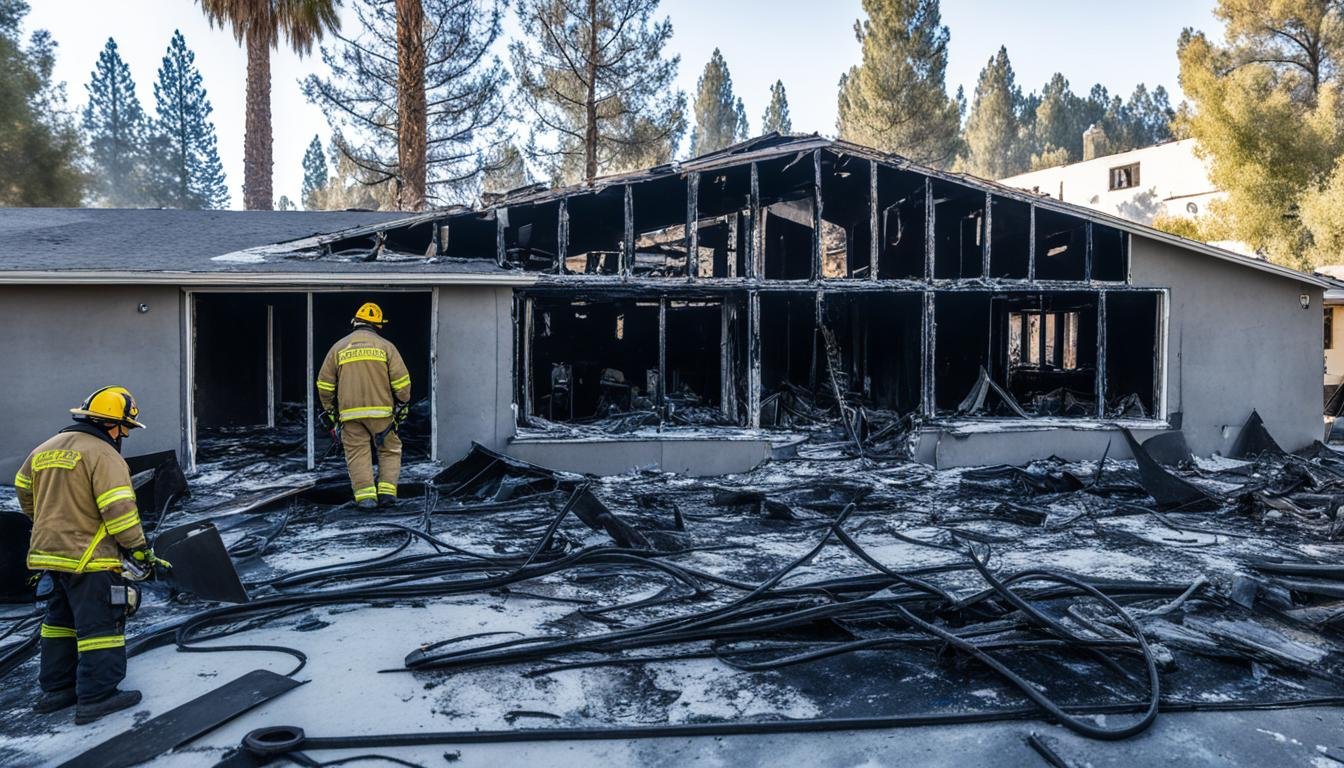
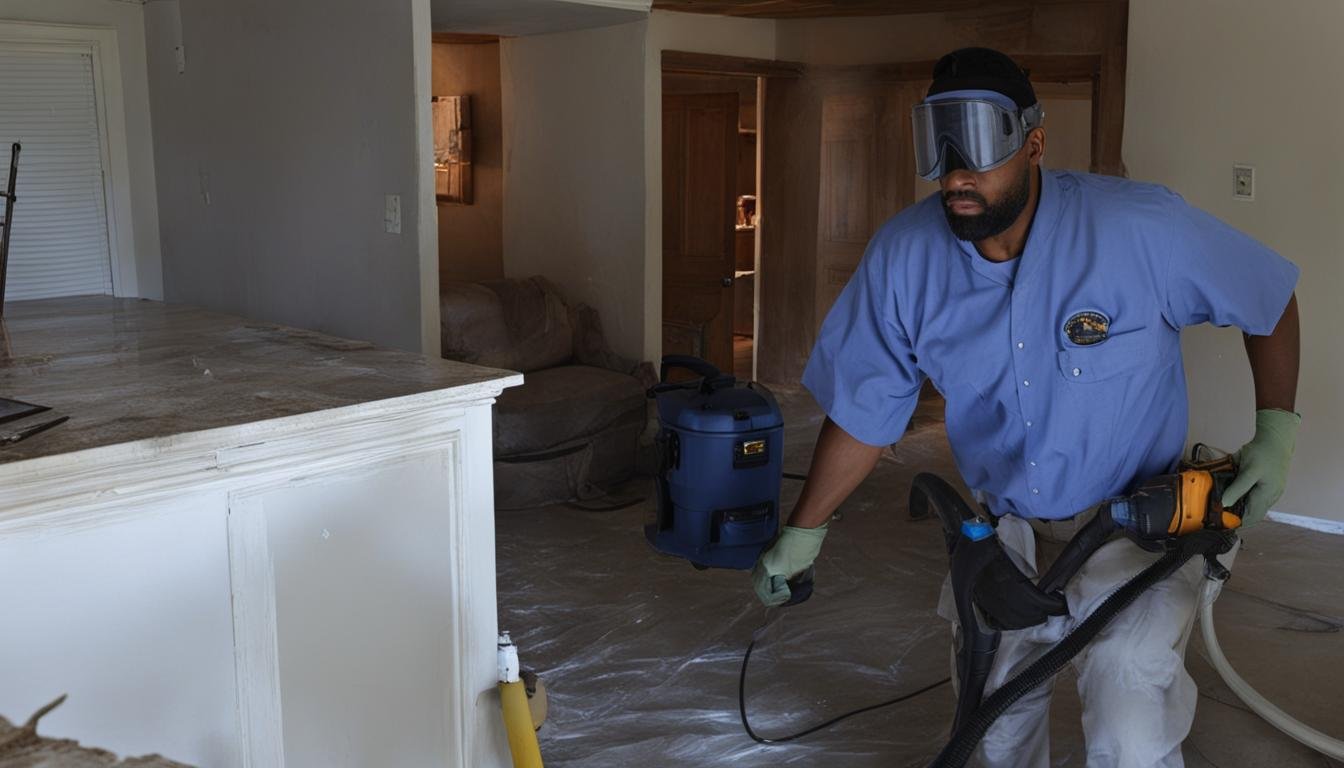
As the cozy winter season approaches, it’s important to remember that winter can also bring harsh weather conditions that pose a threat to our homes. From burst pipes to iced rooftops, winter weather can wreak havoc. Preparing your home for winter can help you mitigate damage and avoid costly repair bills. Key Takeaways: Protect your home from winter water damage by taking proactive measures. Insulate your home to keep it warm and reduce energy costs. Perform regular maintenance to ensure your home is ready for the winter season. Weatherproof your home’s exterior to prevent damage from snow, ice, and freezing temperatures. Take steps to prevent frozen pipes and water damage. How to Prepare Your Home’s Exterior for Winter Your home’s exterior is the first line of defense against harsh winter weather. Taking proactive steps to winterize your home can help prevent potential damage and ensure the safety and comfort of your household. Here are some essential tips to prepare your home’s exterior for the winter season: Clean your gutters: Before winter arrives, it’s important to clean out your gutters to remove any debris or blockages. This helps prevent water from overflowing and causing damage to your roof and foundation. By keeping your gutters clean, you can also prevent ice dams, which can lead to leaks and water damage inside your home. Trim back tree branches: Inspect the surrounding trees and trim back any branches that are close to or overhang your home. Winter storms and heavy snow can cause branches to break and fall, potentially damaging your roof, windows, or siding. By trimming back the branches, you reduce the risk of such damage. Re-caulk windows and doors: Check the caulk around your windows and doors and replace any damaged or worn-out caulking. This will help seal gaps and prevent drafts, keeping your home warm and reducing energy consumption. Additionally, it helps prevent moisture from seeping into your home, which can lead to mold growth and water damage. Get your roof inspected: Schedule a professional roof inspection before the winter season begins. A qualified roofer can identify any existing issues that need to be addressed, such as loose or missing shingles, damaged flashing, or weakened areas. By addressing these problems early on, you can prevent potential leaks or structural damage during winter storms. Get your chimney inspected: If you have a fireplace or wood-burning stove, it’s essential to have your chimney inspected and cleaned before using it during the winter. A professional chimney sweep can remove creosote buildup, identify any cracks or blockages, and ensure that the chimney is functioning properly. This helps prevent chimney fires and carbon monoxide poisoning. Protect against ice dams: Ice dams occur when snow melts on the warmer parts of your roof and refreezes near the colder eaves. This can lead to water seeping under the shingles and causing damage to the roof and interior of your home. To protect against ice dams, make sure your attic is properly insulated and ventilated. This helps maintain a consistent roof temperature and prevents snow from melting unevenly. By following these steps to prepare your home’s exterior for winter, you can ensure its durability, protect against potential damage, and maintain a warm and comfortable living environment throughout the cold season. Preparation Step Description Clean your gutters Remove debris and blockages to prevent water overflow and ice dams. Trim back tree branches Reduce the risk of roof and siding damage caused by falling branches. Re-caulk windows and doors Seal gaps to prevent drafts, moisture infiltration, and energy loss. Get your roof inspected Address any existing roof issues to prevent leaks and structural damage. Get your chimney inspected Ensure a safe and efficient fireplace operation by detecting and resolving potential chimney problems. Protect against ice dams Properly insulate and ventilate your attic to prevent uneven snow melting and water seepage. How to Prepare Your Home’s Interior for Winter With the exterior of your home protected from the harsh winter weather, it’s time to turn your attention to the interior. By taking a few key steps, you can ensure that your home is cozy, comfortable, and well-prepared for the colder months ahead. Inspect Home Systems Before winter sets in, it’s important to inspect your home’s systems to ensure they are in good working order. Take the time to check your HVAC system, plumbing, and electrical components. This will help you identify any issues that need to be addressed before the colder weather arrives, preventing potential breakdowns or hazards that could leave you without heat or hot water on a chilly winter day. Reverse Ceiling Fans A simple yet effective way to enhance the warmth in your home is by reversing your ceiling fans. By changing the direction of the fan blades to rotate clockwise, you can help circulate warm air that has risen to the ceiling and push it back down into the room. This can make your space feel warmer and more comfortable, reducing your reliance on heating systems and saving you money on energy bills. Enhance Home Insulation One of the most effective ways to keep your home warm during the winter is by enhancing its insulation. Start by sealing drafts around windows and doors using weatherstrips or caulk. This will help prevent cold air from entering and warm air from escaping, significantly reducing heat loss. Adding extra insulation in the attic, walls, and floors can further enhance your home’s ability to retain heat and improve energy efficiency. Seal Drafts Drafts can significantly impact the comfort and energy efficiency of your home during the winter months. Take the time to locate and seal any drafts around windows, doors, outlets, and other areas where cold air may enter. This can be done using weatherstrips, door sweeps, or window sealant. Sealing drafts will not only keep your home warmer but also save you money on heating costs in the long run. Insulate Pipes Freezing temperatures can cause pipes to burst, leading to costly water damage. To protect your pipes, insulate them …

Addressing Wood Floor Water Damage: Restoration and Prevention Techniques

Floor Water Damage In San Bernardino

Water damage on wood floors can have devastating effects, leading to discoloration, warping, and structural damage. If you’re dealing with floor water damage in San Bernardino, it’s crucial to understand the restoration and prevention techniques that can help salvage your wood floors and protect them from future damage. When facing water damage, the first step is to assess the severity of the situation. Look for signs of buckling or warping, inspect for discoloration or staining, and check for any mold or mildew growth. Once you’ve determined the extent of the damage, it’s essential to take immediate action to minimize further harm. Read More Key Takeaways: Water damage on wood floors can lead to discoloration, warping, and structural damage. Assess the severity of the water damage by checking for signs of buckling, discoloration, and mold growth. Take immediate action to stop the source of water, remove standing water, and dry the area. Prevention techniques include maintaining consistent humidity levels, cleaning up spills promptly, and using protective mats and rugs. If the damage is extensive or involves specialty wood flooring, seeking professional help is advisable. How to Repair Water-Damaged Hardwood Floors When faced with water damage on your beautiful hardwood floors, prompt action and appropriate repair techniques are crucial to prevent further damage and restore their original beauty. Here are the steps you need to take to fix water-damaged hardwood floors: Assess the damage: Begin by evaluating the extent of the water damage. Is it localized or widespread? This assessment will help determine the appropriate course of action. Remove excess water: If there is standing water on the floor, use a mop or towels to soak up as much water as possible. Be thorough and ensure the area is dry before proceeding. Inspect the floor: Carefully examine the affected area for any signs of damage such as warping, cupping, or discoloration. Take note of any boards that may need to be replaced. Replace damaged boards: If the water damage has caused irreparable harm to specific boards, carefully remove them and replace them with new ones that match the existing flooring. Sand and refinish: Sanding the affected area will help remove any remaining stains and smooth out the surface. After sanding, apply a suitable finish to restore the floor’s luster. Color blending: If necessary, blend the color of the repaired area with the surrounding flooring to achieve a seamless appearance. A professional can assist you with color matching techniques. Prevent future damage: Implement preventive measures to protect your hardwood floors from future water damage. These can include using rugs or mats in high-risk areas, promptly cleaning up spills, and maintaining a consistent indoor humidity level. Remember, the efficacy of repairing water-damaged hardwood floors depends on the extent of the damage and how quickly you take action. In many cases, wet hardwood floors can be saved if the damage is minimal and addressed promptly. However, it’s important to assess the situation and consider consulting a professional if needed. Removing Water Stains from Hardwood Floors In addition to fixing water-damaged hardwood floors, you may also need to address water stains that have formed. The approach to removing water stains depends on the type and severity of the stain: Light stains: Light water stains can often be removed by gently rubbing the area with a mixture of baking soda and water. Be sure to test this method on a small, inconspicuous area first. Deeper stains: Deeper and more stubborn water stains may require the use of a commercial hardwood floor cleaner or a homemade solution of vinegar and water. Apply the solution to the stain and let it sit for a few minutes before gently scrubbing with a soft cloth. Keep in mind that aggressive scrubbing or using harsh chemicals can damage the finish of your hardwood floors, so proceed with caution. If these methods do not effectively remove the water stains, it may be necessary to consult a professional for further assistance. Addressing Swollen Hardwood Floors Swollen hardwood floors are a common consequence of water damage. Here’s how you can fix swollen hardwood floors: Identify and resolve the source of moisture: Before addressing the swollen area, it’s crucial to identify and fix the underlying cause of the water damage, such as a leak or excess humidity. Remove excess water: Use fans, dehumidifiers, or towels to remove any remaining moisture from the swollen area. Proper drying is essential to prevent further damage and mold growth. Allow natural drying: Give the floor enough time to dry naturally. Avoid using heaters or other artificial heat sources, as they can cause further damage to the wood. Check the subfloor and underlayment: Inspect the subfloor and underlayment for any signs of damage or moisture. Address any issues to ensure long-term stability. Sand the swollen area: Once the floor is completely dry, sand the swollen area to level it with the rest of the floor. Take care not to sand too aggressively to avoid damaging the surrounding wood. Apply wood moisture stabilizer: Treat the swollen area with a wood moisture stabilizer to restore its moisture content and prevent future swelling. Stain and refinish: After applying the stabilizer, stain and refinish the affected area to match the rest of the floor. This step will help restore its appearance and protect it from future damage. Replace severely damaged boards: If certain boards are severely damaged and beyond repair, consider replacing them with new ones to ensure the integrity of the floor. Address underlying issues: If the water damage was caused by a plumbing issue or structural problem, make sure to address and resolve these underlying issues to prevent future damage. Implement preventive measures: To avoid future water damage, take preventive measures such as fixing leaks promptly, maintaining proper indoor humidity levels, and promptly addressing spills or water-related incidents. By following these steps, you can effectively repair water-damaged hardwood floors, remove water stains, and fix swollen areas. However, it’s worth noting that severe or extensive water damage may require professional assistance. If you’re …

Uncovering Common Causes of Residential Water Damage

Residential Water Damage in Riverside County Ca

Water damage can wreak havoc on your home, leading to extensive repairs and costly restoration services. Understanding the common causes of residential water damage is crucial for homeowners in Riverside County, CA, to protect their properties and mitigate potential risks. From external factors like severe weather events to internal issues within your home’s systems, being aware of these causes can help you proactively address and prevent water damage. Key Takeaways: Residential water damage can result from various sources, including weather events and internal issues within the home’s systems. It is essential for homeowners to identify and prioritize potential water-related issues to prevent extensive and costly repairs. Plumbing problems and aging appliances can contribute significantly to water damage, emphasizing the importance of regular maintenance and inspections. Foundation flaws, particularly in areas with unique geological features like expansive clay soils, can lead to water damage if not properly addressed. By understanding these common causes and taking proactive measures, homeowners can minimize the risk of residential water damage and ensure the safety and integrity of their properties. Plumbing Problems and Aging Appliances Plumbing problems and aging appliances can both contribute to water damage in residential properties. Leaky or burst pipes can lead to significant water damage if not addressed promptly. Installing water sensors can help detect plumbing leaks early and prevent further damage. Aging appliances, such as water heaters, washing machines, and dishwashers, can also cause water damage if their hoses malfunction or internal operational problems develop. Regular maintenance and inspections, as well as the installation of water detection systems, are recommended for preventing water damage from plumbing problems and aging appliances. When it comes to plumbing, it is essential to be vigilant and proactive in identifying and resolving issues. A small leak may seem insignificant, but over time it can cause extensive damage to your property. Taking the necessary steps to address plumbing problems can save you from the headache of dealing with water damage restoration services. Here are some common plumbing problems that can lead to water damage: Leaky pipes: Dripping or leaking pipes can gradually saturate surrounding structures, causing water damage to walls, floors, and ceilings. If left untreated, it can lead to mold growth and compromise the structural integrity of your home. Burst pipes: Freezing temperatures or excessive pressure can cause pipes to burst. This sudden burst can release a large volume of water, resulting in immediate and severe water damage. Clogged drains: Blockages in drains can lead to water backups, causing flooding and water damage in your home. It is important to address clogged drains promptly to prevent further damage. Aging appliances can also pose a risk of water damage. Over time, the integrity of hoses and internal components can deteriorate, increasing the chances of leaks or malfunctions. Here are some common examples: Water heaters: Aging water heaters may develop leaks or experience tank failure, resulting in water damage. Regular inspections and maintenance can help identify potential issues before they escalate. Washing machines: Faulty hoses or a malfunctioning water inlet valve can cause water to leak from washing machines, leading to water damage in the surrounding area. Dishwashers: Leaks in dishwasher hoses or malfunctioning seals can result in water escaping and causing damage to the floor and nearby cabinets. By staying proactive and addressing plumbing problems and aging appliances promptly, you can minimize the risk of water damage in your home. Regular inspections, maintenance, and the installation of water detection systems can provide an added layer of protection against costly repairs and water damage restoration. Finding and Fixing Plumbing Leaks “Water is a powerful force and can cause extensive damage to your home if left unchecked. It’s important to regularly inspect your plumbing systems and appliances, looking out for any signs of leaks or malfunctions. Taking swift action to address plumbing issues can prevent water damage and save you money in the long run.” Preventing Water Damage from Aging Appliances “Regular maintenance and inspection of aging appliances are crucial in preventing water damage. Don’t wait for a major malfunction to occur. By staying proactive, you can catch small issues before they escalate and cause extensive damage to your property.” Plumbing Problems Prevention Leaky pipes Repair or replace damaged pipes immediately. Install water sensors to detect leaks early. Burst pipes Insulate exposed pipes in cold weather. Maintain proper water pressure. Clogged drains Use drain screens to prevent debris buildup. Avoid disposing of grease or large objects down drains. Foundation Flaws and Prevention Measures Foundation flaws can pose significant risks to residential properties, especially in areas like Riverside County, California, where unique geological features like expansive clay soils are prevalent. These soils have the tendency to absorb and contract water, exerting pressure on the foundation and causing cracks and openings that allow water infiltration. To safeguard your home from water damage caused by foundation flaws, regular maintenance and inspections are crucial. It’s essential to monitor the condition of your foundation and promptly address any signs of deterioration. Additionally, implementing proper drainage solutions can divert water away from the foundation, reducing the risk of water damage. Proactive landscaping measures can also play a vital role in preventing foundation-related water damage. Properly directing rainwater away from the foundation through the strategic placement of shrubs, trees, and other landscaping features can help minimize water accumulation near the foundation, mitigating the risk of water damage. By addressing foundation flaws proactively and implementing preventive measures, you can protect your residential property in Riverside County, CA, from costly water damage. Regular maintenance, inspections, proper drainage, and proactive landscaping are essential steps to shield your home and ensure its longevity. FAQ What are the common causes of residential water damage in Riverside County, CA? Residential water damage in Riverside County, CA can be caused by various factors, including weather events such as storms and flooding, as well as plumbing problems and aging appliances. Additionally, foundation flaws can also contribute to water damage in residential properties. How can plumbing problems and aging appliances lead to water damage? …

A Buyer’s Guide to Purchasing Water-Damaged Houses

Water Damage Houses Near Me

When searching for a new home, you may come across water-damaged houses. While this may initially seem like a cause for concern, buying a water-damaged home can actually present an opportunity for a great deal on a property. However, it’s important to approach the purchase with caution and be aware of the potential challenges and costs that may come with it. One of the first things to look out for when considering a water-damaged house is visible signs of damage. Stains on walls or ceilings, peeling paint or wallpaper, and musty odors are all indicators of water damage. Before making a decision, it’s advisable to have a professional complete a comprehensive water damage inspection and obtain a written home inspection report. This will give you a better understanding of the extent of the damage and the repairs that may be required. Location is also an important factor to consider when purchasing a water-damaged home. Determine if the house is in a flood zone and research the potential risks associated with that location. It’s essential to obtain homeowner’s insurance quotes and consider the additional cost of flood insurance if necessary. Once you have purchased a water-damaged home, immediate repairs should be made to prevent further damage and potential mold growth. Take detailed documentation of the damage through pictures, videos, and receipts. This will be important when filing insurance claims. Working with a real estate agent experienced in buying and selling water-damaged homes can provide valuable guidance throughout the process. They can help you navigate the challenges and ensure that you make an informed decision. Thoroughly inspect the water-damaged house for visible signs of damage. Obtain a comprehensive water damage inspection and written home inspection report. Consider the location of the house and the potential risks associated with it. Secure homeowner’s insurance quotes and, if needed, flood insurance. Make immediate repairs to prevent further damage and mold growth. The Role of Home Inspectors in Buying Water-Damaged Houses When purchasing a house with water damage, enlisting the expertise of home inspectors is crucial. These professionals play a vital role in assessing the extent of the damage and providing detailed reports, especially when it comes to issues related to water damage. During the inspection process, home inspectors are trained to identify common signs of water damage. They meticulously examine the property for stains, water rings, and musty odors, all of which can indicate the presence of water damage. Additionally, home inspectors evaluate the HVAC system and other potential sources of water damage to provide a comprehensive assessment of the property’s condition. It’s important to note the distinction between home inspections conducted by licensed inspectors and assessments carried out by water damage restoration companies. While both are essential in their respective ways, home inspections focus on evaluating the overall condition of the property, including identifying any water damage concerns. Furthermore, homebuyers should consider additional services that home inspectors may offer, such as mold testing. Detecting the presence of mold is crucial, especially when buying a water-damaged home, as it can lead to further issues if not properly addressed. If mold is detected, it may be necessary to hire professional mold remediation services. Ultimately, the thorough assessment provided by home inspectors is invaluable when making informed decisions about purchasing water-damaged houses. Their expertise ensures that buyers have a comprehensive understanding of the property’s condition, allowing them to determine the necessary repairs and associated costs. Home Inspector Checklist for Water-Damaged Houses Inspect for signs of water damage, such as stains, water rings, and musty odors. Evaluate the HVAC system and other potential sources of water damage. Check for visible signs of mold and conduct mold testing if necessary. Assess the extent of the damage and provide a detailed report. Differentiate between water damage and other structural issues. Remember, hiring a qualified home inspector is crucial to ensure the accuracy of the assessment. Their expertise and thorough evaluation provide buyers with the necessary information to make informed decisions about purchasing water-damaged houses. The Impact of Water Damage on Homes and the Buying Process Water damage can have serious consequences for a property, both immediate and long-term. When water infiltrates a home, it can result in contamination, damage to flooring and furniture, increased humidity levels, and the growth of mold and fungi. If left untreated, water damage can lead to rotting wood, foundation problems, and the need for extensive repairs. These issues can significantly impact the value and safety of a home. When considering buying a home with water damage, it is crucial to thoroughly assess the extent of the damage and determine the source of the water intrusion. Signs to watch out for include peeling paint, wet spots, musty odors, and damaged drywall. Hiring a professional home inspector is essential to identify hidden water damage and provide an expert assessment of the repairs needed. Consulting with professional water damage cleanup experts and contractors can give you a better understanding of the scope of the restoration work and the associated costs. Obtaining multiple estimates from local water damage experts will help you make an informed decision about the property’s feasibility and your potential investment. Moreover, it is essential to consider homeowner’s insurance coverage for water damage and evaluate the need for additional flood insurance if the property is located in a flood zone. To protect yourself and your investment, it’s crucial to take these necessary steps when buying a water-damaged home. With the guidance of experienced professionals and thorough inspections, you can make informed decisions and ensure that the necessary repairs are completed before moving forward with the purchase. FAQ What are some signs of water damage in a house? Signs of water damage include stains on walls or ceilings, peeling paint or wallpaper, and musty odors. Should I have a professional inspect the water damage before buying a house? Yes, it is recommended to have a professional complete a comprehensive water damage inspection and obtain a written home inspection report. What should I consider before buying a …

Protecting Your Home from Flood Damage: Essential Measures for Prevention

Home Flood Damage Near Me

Living in an area prone to floods can put your home at risk of significant damage. However, by implementing essential flood prevention measures, you can safeguard your home and minimize the potential impact. In this section, we will explore crucial steps you can take to evaluate your home’s flood risk, acquire proper flood insurance coverage, and maintain effective drainage systems. Key Takeaways: Evaluate your home’s flood risk through resources like FEMA’s Flood Map Service Center and Risk Factor assessments. Consider purchasing a separate flood insurance policy, as standard homeowners insurance generally does not cover flood damage. Maintain proper drainage around your home by ensuring the grade slopes away from the foundation and regularly inspecting gutters, downspouts, and the overall drainage system. Preparing Your Home for a Flood: Proactive Steps for Safety Being prepared for a flood is crucial for the safety of your home and family. By taking proactive measures, you can minimize the potential damage caused by flooding and ensure the well-being of your loved ones. Develop a Flood Evacuation Plan Creating a detailed flood evacuation plan is essential in case of an emergency. Identify a meeting place outside your home where family members can gather if you become separated. Discuss evacuation routes and establish a communication plan to stay connected during a flood event. Secure Valuables and Documents Protecting your valuable possessions and important documents should be a priority. Prepare an itemized list of your valuables and store them in a safe place. Consider keeping digital copies of important documents to minimize the risk of losing vital information. Stockpile Emergency Supplies Having essential emergency supplies readily available is crucial during a flood. Create an emergency kit that includes items such as canned food, bottled water, medications, first aid kits, flashlights, portable radios, extra batteries, and emergency cooking equipment. Ensure that you have enough supplies to sustain your family for at least 72 hours. Seal Foundation and Basement Walls Preventing water seepage into your home is essential to minimize flood damage. Seal any cracks in your foundation and basement walls using specialized sealants. This will help to keep water out and protect the structural integrity of your home. Install a Sump Pump A sump pump is a valuable tool in defending against basement flooding. It works by redirecting groundwater away from your home’s foundation, keeping your basement dry. Consider installing a sump pump or ensuring that your existing one is in proper working condition. Use Flood-Resistant Building Materials When renovating or building your home, consider using flood-resistant building materials. Materials such as ceramic tile, vinyl, or pressure-treated wood can mitigate damage in the event of a flood. These materials are designed to withstand exposure to water and minimize the need for extensive repairs. Proactive Steps for Safety Develop a flood evacuation plan Secure valuables and documents Stockpile emergency supplies Seal foundation and basement walls Install a sump pump Use flood-resistant building materials After the Flood: Essential Steps for Recovery and Restoration After experiencing a flood, it’s important to prioritize your safety and take immediate action to begin the recovery and restoration process. Start by following the instructions of local officials and wait until the area has been declared safe before reentering. Exercise caution while driving, as roads may be damaged, and power lines may be down. Prior to entering any building, carefully check for structural damage. If necessary, turn off gas lines and allow the building to air out. Use battery-powered flashlights for lighting and avoid open flames which can easily ignite gas or other flammable substances. Remove any items that have come into contact with floodwaters, including food and medicine, as they may pose health risks. It’s essential to test the drinking water for portability and to pump out wells that have been flooded. Shovel out the mud and take measures to thoroughly clean and sanitize heating and plumbing systems. If your basement has been affected by the flood, drain and clean it with caution to prevent further structural damage. Prior to using any appliances, ensure your electrical system is inspected by a professional. This will help identify any safety hazards and prevent electrical issues or potential accidents. Finally, consider reaching out to professional flood damage restoration services for comprehensive cleaning, drying, and sanitization of your home. They can also address any necessary structural repairs, bringing your home back to its pre-flood condition. FAQ How can I evaluate the flood risk of my property? You can evaluate the flood risk of your property by checking FEMA’s Flood Map Service Center online and considering tools like Risk Factor for long-term projection assessments. Does homeowners insurance cover flood damage? Most standard homeowners insurance policies do not cover flood damage, so it is highly recommended to purchase a separate flood insurance policy. How can I maintain proper drainage around my home? To maintain proper drainage around your home, ensure that the grade slopes away from the foundation to prevent water accumulation. Regularly inspect your gutters, downspouts, and overall drainage system for effective water runoff. How can I prepare for a flood evacuation? To prepare for a flood evacuation, develop a flood evacuation plan and identify a meeting place in case family members become separated. Prepare an itemized list of valuable possessions and important documents, keeping them in a safe place. What essential emergency supplies should I stockpile for a flood event? Essential emergency supplies to stockpile for a flood event include canned food, medicine, first aid kits, drinking water, portable radios, flashlights, extra batteries, and emergency cooking equipment. How can I protect my home’s interior from flood damage? To protect your home’s interior from flood damage, consider sealing foundation cracks and basement walls to prevent seepage. Install flood vents in enclosures like crawlspaces or garages to allow floodwater to flow freely. Installing a sump pump can also redirect groundwater away from your home and prevent basement flooding. What building materials are flood-resistant? Flood-resistant building materials include ceramic tile, vinyl, and pressure-treated wood, which can help mitigate damage in the event …

Identifying Common Causes of Fire Damage and Repair Solutions

Fire Damage Repair In San Bernardino

Fires can be extremely damaging to homes and properties, causing destruction and leaving families devastated. It is essential to understand the common causes of fire damage in order to take preventive measures and ensure the safety of your loved ones and your property. In this article, we will explore some of the leading causes of fire damage and provide repair solutions to help you recover from such incidents. Key Takeaways: Cooking fires and heating equipment malfunctions are the leading causes of house fires. Grease fires from cooking can be prevented by keeping the stove and oven clean and free from grease buildup. Proper maintenance and use of heating equipment can help prevent accidents and reduce the risk of fire. Smoking materials and electrical hazards are also common causes of fire damage in homes. Safe smoking habits and regular inspection of the electrical system are crucial in minimizing the risk of fire incidents. By being aware of these common causes and implementing the necessary precautions, you can significantly reduce the risk of fire damage to your property. However, accidents can still happen, and it is important to be prepared in case of a fire. In the event of fire damage, seeking professional fire damage repair services is crucial for effective restoration and repair. Water Damage Pros is a trusted provider of fire damage restoration services in San Bernardino, offering 24/7 emergency cleanup and repair solutions. Smoking and Electrical Hazards as Causes of Fire Damage When it comes to fire damage in homes, smoking materials and electrical hazards are two significant culprits. Being aware of these causes and taking proactive measures can help prevent devastating fires. Smoking Materials Smoking-related fires, including those caused by cigarettes, cigars, and pipes, are responsible for numerous home fire deaths each year. The risk increases significantly when smoking is done in bed or on upholstered furniture, as hot ashes can easily ignite flammable materials. Taking precautions and practicing safe smoking habits can help mitigate the risk of fire damage. Remember, always dispose of cigarette butts in designated receptacles, ensuring they are fully extinguished. Smoking should be avoided indoors, especially in bed or near flammable items. Electrical Hazards Electrical hazards are another leading cause of house fires. Issues such as faulty wiring, overloaded circuits, and improper use of electrical appliances can result in electrical fires. It is crucial to have your home’s electrical system inspected by a qualified electrician to ensure its safety. Additionally, practicing proper electrical usage, such as avoiding the use of damaged cords and not overloading outlets, is essential in preventing fire damage. Regularly check your electrical appliances for any signs of wear or damage. If you notice any issues, have them repaired or replaced immediately to minimize the risk of fire. By understanding and addressing the risks associated with smoking materials and electrical hazards, you can significantly reduce the likelihood of fire damage in your home. However, if a fire does occur, it is crucial to rely on professional fire damage repair services to restore and repair your property. Water Damage Pros is a trusted fire damage restoration company and fire damage repair contractor in San Bernardino. They offer professional fire damage repair services, ensuring efficient and thorough restoration of your property. Don’t leave the repair process to chance; contact the experts at Water Damage Pros for expert assistance. Chemical Fires and Intentional Fire Setting Chemical fires pose a significant risk and can occur when flammable chemicals come into contact with an open flame or when certain chemicals react with oxygen to generate enough heat for ignition. To prevent chemical fires, it is crucial to handle and store flammable chemicals properly, including substances like gasoline. One of the leading causes of fire damage is intentional fire setting, often associated with arson. Arson not only puts lives at risk but also causes massive property damage. To deter such incidents and protect your property, it is advisable to install security measures like closed-circuit television (CCTV) cameras and motion-sensor lighting. The Dangers of Chemical Fires Chemical fires can be highly dangerous and pose significant risks to individuals and properties. These fires often release toxic fumes, posing a threat to human health and the environment. The combustion of certain chemicals can also result in explosive reactions, causing additional hazards. Proper storage and handling of chemicals are vital to prevent chemical fires. Flammable chemicals should be stored in designated areas away from ignition sources and in compliance with all safety regulations. It is essential to follow proper storage guidelines and precautions provided by manufacturers. Detering Intentional Fire Setting Intentional fire setting, such as arson, can be a devastating act, causing extensive damage and putting lives at risk. Taking preventive measures can help deter such incidents and protect your property. Installing closed-circuit television (CCTV) cameras can serve as a deterrent, as potential arsonists are less likely to commit crimes when they know they are being monitored. Motion-sensor lighting can also discourage individuals from engaging in suspicious activities, thereby reducing the chances of intentional fire setting. Emergency Service Availability Emergency Fire Damage Cleanup 24/7 Fire Damage Repair 24/7 Fire Damage Restoration Experts 24/7 When confronted with fire damage, it is essential to act swiftly and seek emergency fire damage cleanup and repair services. The prompt response of fire damage restoration experts can minimize further harm, restore your property, and ensure the safety of occupants. Conclusion House fires can cause serious damage and devastation. By understanding the common causes of fire damage and implementing fire safety measures, such as proper cooking practices, regular maintenance of heating equipment, safe smoking habits, electrical inspections, and secure storage of chemicals, you can reduce the risk of fire incidents in your home. In the unfortunate event of fire damage, it is crucial to seek professional fire damage repair services to restore and repair your property. Water Damage Pros is a reputable fire damage restoration company that provides 24/7 emergency fire damage cleanup and repair services in San Bernardino. Our team of experts is trained and …

Understanding the Health Risks of Mold Damage: What You Need to Know

Mold Damage Health Risks in San Bernardino County

Mold is a common issue in buildings and homes, especially in areas with high moisture. It can grow on various surfaces, such as paper products, ceiling tiles, and wood. The most common indoor molds include Cladosporium, Penicillium, and Aspergillus. Mold can enter homes through open doorways, windows, vents, and HVAC systems. Exposure to mold can cause a variety of health effects, including respiratory symptoms, allergies, and asthma. Certain individuals, such as those with allergies or compromised immune systems, may be more susceptible to mold-related health issues. To prevent mold growth, it’s important to control humidity levels, fix any water leaks, and ensure proper ventilation in areas like bathrooms and kitchens. Key Takeaways: Mold is a common problem in buildings and homes, particularly in areas with high moisture. Mold exposure can cause respiratory symptoms, allergies, and asthma. Individuals with allergies or compromised immune systems may be more susceptible to mold-related health issues. To prevent mold growth, control humidity levels, fix water leaks, and ensure proper ventilation. Regular inspections and prompt remediation are crucial for addressing mold damage. Signs and Symptoms of Mold Exposure Mold exposure can have various health effects on individuals. It is important to be aware of the signs and symptoms associated with mold exposure. Some common symptoms include: Respiratory Issues: Mold exposure can cause respiratory symptoms such as coughing, wheezing, and shortness of breath. People with pre-existing respiratory conditions like asthma may experience more severe reactions. Allergic Reactions: Some individuals may develop allergies to mold, leading to symptoms like a stuffy or runny nose, itchy or watery eyes, and skin rashes. Occupational Hazards: In occupational settings with high mold exposure, workers may experience flu-like symptoms, fever, and fatigue, along with respiratory problems and shortness of breath. The Institute of Medicine (IOM) has linked indoor mold exposure to respiratory symptoms and asthma exacerbation. While there is limited evidence linking other health effects such as memory loss or infant hemorrhage to mold exposure, further research is needed to establish these connections definitively. It’s important to note that there is currently no blood test available to determine mold exposure. Allergy testing can only identify potential allergies to mold without pinpointing specific instances of exposure. If you suspect mold exposure or are experiencing any of the symptoms mentioned, it is recommended to consult a healthcare professional for proper evaluation and guidance. “Mold exposure can have a range of health effects, from respiratory issues to allergic reactions. It’s crucial to recognize the signs and symptoms associated with mold exposure and take appropriate measures to address any potential hazards.” – Dr. Sarah Thompson, Environmental Health Specialist Preventing and Remediating Mold Damage In order to protect your property from mold damage, it’s important to be proactive and implement proper preventative measures. Regular inspections for water damage and visible mold are crucial to catch any issues early. If you notice any leaks, condensation, or flooding, address these conditions promptly to prevent mold growth. Maintaining humidity levels between 30% and 50% can help inhibit mold growth, so be sure to monitor and control moisture levels accordingly. Fixing any water leaks in roofs, windows, or pipes as soon as possible is essential. After any flooding or water damage, thoroughly clean and dry the affected areas within 24-48 hours to prevent mold from taking hold. Adequate ventilation in areas that are prone to moisture, such as bathrooms, kitchens, and laundry rooms, is also essential. Installing exhaust fans and ensuring that clothes dryers vent outside can help minimize the risk of mold growth. If you find extensive mold infestations in your property, it may be necessary to seek professional mold removal services. These experts have the knowledge and tools to effectively remediate the mold issues and prevent further damage. Regular indoor air quality testing is also recommended to identify and address any mold problems before they become severe. Additionally, consider using mold-resistant materials and removing or replacing any wet carpets and upholstery to further reduce the risk of mold growth in your home or building. FAQ What are the health risks associated with mold damage? Mold damage can pose several health risks, including respiratory symptoms, allergies, and asthma. Individuals with allergies or compromised immune systems may be more susceptible to mold-related health issues. What are the signs and symptoms of mold exposure? Symptoms of mold exposure can vary but may include a stuffy nose, wheezing, itchy eyes, and in severe cases, fever and shortness of breath. People with pre-existing respiratory conditions like asthma may experience more severe reactions. How can I prevent and remediate mold damage? To prevent mold growth, it’s important to control humidity levels, fix water leaks promptly, ensure proper ventilation, and regularly inspect buildings for water damage and visible mold. If mold infestations are extensive, it may be necessary to hire a professional mold removal service. Regular indoor air quality testing can also help identify and mitigate mold issues.

Securing Your Home While You’re Away: Vacation Home Protection Strategies

Vacation home water damage

When you own a vacation home, it’s important to take steps to protect your property from water damage while you’re away. Water damage can occur due to various reasons such as leaks, floods, or burst pipes, and it can result in costly repairs and damage to your belongings. By implementing the right protection strategies, you can minimize the risk of water damage and ensure peace of mind during your vacations. Key Takeaways: Water damage can be a significant threat to vacation homes Implementing protection strategies is crucial to prevent water damage Leak detection systems and shut-off valves can help minimize the risk Regular inspections and maintenance are important in identifying and addressing potential issues Consider installing flood sensors or alarms to alert you of potential water damage Installing a Home Security System One effective way to protect your vacation home from water damage is to install a home security system. A home security system not only helps to deter burglars but also provides monitoring for potential threats such as fires and floods. Consider: Installing outdoor security lights to illuminate the entry points of your home and discourage burglars. Adding security cameras to monitor your property remotely and detect any unusual activities. Investing in video doorbells that offer two-way communication and give the impression that the house is occupied. Using door sensors, window sensors, and glass break sensors to alert you to any breaches in security. Displaying a security yard sign or sticker to further deter potential burglars. By investing in a comprehensive security system, you can protect your vacation property from water damage and other security risks. Image: Installing a home security system can help protect your vacation home from water damage. Securing the Outside of Your Home When it comes to protecting your vacation home from water damage and other potential risks, don’t forget about securing the outside of your property. By taking a few simple precautions, you can make your vacation home less appealing to burglars and reduce the risk of water damage or other property damage. Lock Up and Disconnect Before leaving your vacation home, make sure to lock all doors and windows to prevent unauthorized entry. Consider disconnecting the garage door opener or installing a smart garage door opener that can be controlled remotely. This way, you can ensure that your garage remains secure even when you’re not around. Strengthen Your Doors and Windows Investing in strong exterior doors made of solid wood or steel can serve as a deterrent to potential burglars. Additionally, using deadbolt locks can provide an extra layer of security. For basement windows, consider installing block windows or locked window well covers to prevent unauthorized access. And don’t forget about securing pet doors with locks to prevent unwanted animals or intruders from entering your vacation home. Illuminate and Suspend Shadows Motion-activated sensors on outdoor floodlights can help eliminate shadowy areas around your property, making it less attractive to potential intruders. By ensuring that your vacation home is well-lit, you can discourage burglars and improve the overall security of your property. Engage Your Neighbors and Maintain Appearances Building a good relationship with your neighbors can be beneficial when it comes to protecting your vacation home. Consider asking a trusted neighbor to pick up mail and newspapers while you’re away to avoid accumulating signs of vacancy. Additionally, periodically parking a car in the driveway, putting lights on timers, and scheduling lawn maintenance can create the impression that your vacation home is regularly occupied, deterring potential burglars. Tips for Protecting Your Vacation Home Tips Description Lock all doors and windows Ensure that all entry points are properly secured before leaving your vacation home. Disconnect or install a smart garage door opener Prevent unauthorized access to your garage by disconnecting the opener or using a smart opener that can be controlled remotely. Invest in strong exterior doors Strengthen the security of your vacation home by installing solid wood or steel doors. Use deadbolt locks Add an extra layer of security to your doors by using deadbolt locks. Install motion-activated sensors for outdoor floodlights Eliminate shadowy areas around your vacation home to deter potential intruders. Secure basement windows Use block windows or locked window well covers to prevent unauthorized access through basement windows. Lock pet doors Secure pet doors to prevent unwanted access to your vacation home. Ask a trusted neighbor for help Request assistance from a neighbor to pick up mail and newspapers or keep an eye on your property. Maintain appearances Create the illusion of occupancy by periodically parking a car in the driveway, putting lights on timers, and arranging for lawn maintenance. Conclusion Taking proactive measures to protect your vacation home from water damage while you’re away is crucial. Installing a home security system and securing the outside of your property can go a long way in preventing water damage and ensuring the safety of your vacation home. By investing in the right security measures, you can enjoy your vacations without worrying about the potential risks of water damage. Remember to consult with professionals, such as Water Damage Pros, for assistance and advice tailored to your specific vacation property needs. With their expertise in water damage restoration for vacation homes, they can provide you with the necessary services to mitigate any potential damage and restore your property should an unfortunate incident occur. FAQ How can I protect my vacation home from water damage? There are several steps you can take to protect your vacation home from water damage. Installing a home security system, securing the outside of your home, and taking proactive measures while you’re away can help minimize the risk of water damage. How does a home security system help protect against water damage? A home security system provides monitoring for potential threats such as fires and floods. It can alert you to any water leaks or flooding in your vacation home, allowing you to take prompt action and minimize water damage. What are some measures I can take to secure the …

Drying Walls After Water Damage: Effective Strategies for Restoration

Drying walls after water damage in San Bernardino

When water damage occurs in your home or property, it’s important to take immediate action to prevent further damage and potential mold growth. The walls are particularly susceptible to water damage and require special attention during the restoration process. Whether you’re dealing with a burst pipe, a leaking roof, or flooding, drying the walls thoroughly is essential to preserve the integrity of your property. In San Bernardino, where water damage can be a common issue, it’s crucial to have effective strategies for drying walls after water damage. Key Takeaways: Immediate action is necessary to prevent further damage and mold growth Shut off the water source and remove wall décor to promote airflow Remove insulation and wet wallboard, and ventilate the area with fans and dehumidifiers Use a moisture meter to determine when the walls are dry and ready for refinishing Contact a professional water damage restoration team for thorough drying and prevention of further damage Steps to Drying Out Water-Damaged Walls The process of effectively drying water-damaged walls involves several crucial steps to prevent further damage, mold growth, and ensure successful water damage remediation. Here are the key steps to follow: Ensure Safety: Prioritize your safety and address any potential electrical or structural hazards before proceeding with the drying process. Remove Standing Water: Utilize appropriate equipment such as submersible pumps or wet-dry vacuums to remove any standing water from the affected area. This step is vital for minimizing moisture and accelerating the overall drying process. Promote Ventilation and Dehumidification: Enhance airflow and reduce moisture by opening windows and doors, using fans to circulate air, and running dehumidifiers to extract excess humidity from the environment. Clean and Disinfect: Thoroughly clean and disinfect the water-damaged area to remove contaminants, prevent mold growth, and ensure a safe environment. Use suitable disinfectants recommended by professionals in water damage restoration. Remember, when dealing with water damage, time is of the essence. It is crucial to act quickly and consult a professional water damage restoration specialist who has the expertise in drying techniques and possesses the necessary equipment for efficient and effective moisture removal. By following these steps, you can significantly improve the chances of successful wall drying and minimize the risk of further damage or mold growth in your property. See the table below for a comparison of common wall drying methods: Wall Drying Method Advantages Disadvantages Open Air Drying Promotes natural airflow and ventilation, cost-effective Slower drying time, less suitable for highly saturated walls, weather-dependent Dehumidification Efficient moisture removal, suitable for high humidity environments May require professional equipment, higher energy costs Heat Drying Accelerates drying process, effective for drying out walls with low porosity Requires professional equipment, potential risk of heat damage to sensitive materials Infrared Drying Precise targeting of moisture areas, non-intrusive, quick results Requires specialized equipment, higher cost These common wall drying methods offer different advantages and disadvantages, and the best approach will depend on the specific circumstances of the water damage. Consulting with a professional water damage restoration specialist can help determine the most suitable wall drying technique for your situation. How Long Does it Take for Wet Drywall to Dry? The time it takes for wet drywall to dry depends on various factors, including the extent of the water damage, the drying technique used, the type of wall covering, and the openness of the wall. The more water that has soaked into the drywall, the longer it will take to dry. Using multiple drying equipment and increasing air flow can help expedite the drying process. Wall coverings such as paint and wallpaper can also affect drying time. In some cases, it may be necessary to remove the wall to allow for efficient drying. Working with a professional water damage restoration contractor can ensure a more efficient drying process and prevent mold growth. Drying Time Factors Impact on Drying Time Extent of water damage More severe damage takes longer to dry Drying technique used Effective techniques expedite drying Type of wall covering Some coverings retain moisture longer Openness of the wall Opening the wall to air circulation speeds up drying Drying Techniques to Expedite the Drying Process Use high-powered fans to increase air circulation. Place dehumidifiers in the affected area to remove excess moisture from the air. Apply heat to the area to aid in evaporation. Proper drying techniques are essential to prevent mold growth and further damage to the walls. Working with a professional water damage restoration contractor ensures that the drying process is efficient and effective. If the water damage is extensive or the drywall is severely saturated, it might be necessary to remove the wall to allow for thorough drying. This process involves carefully removing the affected drywall sections and properly drying the underlying structure before replacing the drywall. A professional water damage restoration contractor has the expertise to determine when this step is necessary. By understanding the factors that influence drying time and employing the right techniques, property owners can expedite the drying process, minimize further damage, and prevent the growth of mold. Conclusion Drying walls after water damage is of utmost importance in order to prevent further damage and the growth of mold. Taking prompt action, such as shutting off the water source, removing wall décor, and promoting airflow, can expedite the drying process and mitigate potential issues. However, for extensive or severe water damage, it is crucial to seek professional assistance from a reputable water damage restoration company. Professional water damage restoration teams possess the expertise and specialized equipment to thoroughly dry water-damaged walls and effectively prevent mold growth. By entrusting the restoration process to these professionals, property owners can minimize the extent of damage, reduce repair costs, and ensure a safe and healthy living environment. If you are in need of emergency water damage restoration services in San Bernardino, look no further than Water Damage Pros. They are a trusted and experienced company dedicated to providing comprehensive water damage restoration solutions. Contact them at (949) 229-3699 to receive immediate assistance and restore your …

Eliminating Mold from Your Washing Machine: Cleaning and Prevention Tips

Removing Mold From Washing Machine near me

If you’ve noticed mold growth in your washing machine, particularly on the rubber gasket of front-loading machines, it’s essential to take action. Neglecting to clean your machine and improper usage can lead to mold growth, which not only affects the performance of your washer but also poses potential health risks. To ensure a clean and hygienic laundry environment, it’s important to follow a few simple steps to remove mold from your washing machine effectively. First and foremost, it’s crucial to protect yourself from mold spores by wearing gloves and a mask. Then, empty the machine and prepare a cleaning solution. You can either use a commercial mildew cleaner or create your own mixture using ingredients like hydrogen peroxide, lemon juice, distilled white vinegar, or bleach. With a soft cloth, thoroughly clean the rubber gasket, detergent dispenser tray, and drum using the cleaning solution. To ensure a comprehensive clean, run a cleaning cycle with the mold-cleaning solution to disinfect and cleanse the internal parts of the machine. Afterward, wipe down the drum and door, and leave the machine open to air-dry completely. Regular maintenance practices, such as wiping down the door and gasket after each use and leaving the door open for air circulation, can help prevent mold from recurring in your washing machine. Key Takeaways: Protect yourself with gloves and a mask when removing mold from your washing machine. Clean the rubber gasket, detergent dispenser tray, and drum with a cleaning solution. Run a cleaning cycle with a mold-cleaning solution to thoroughly disinfect the machine. Wipe down the drum and door and leave the machine open to air-dry. Maintain regular cleaning practices to prevent mold from recurring. Tips for Preventing Mold Growth in Your Washing Machine In addition to cleaning your washing machine regularly, there are several preventive measures you can take to avoid mold growth. Follow these tips to maintain a mold-free washing machine: 1. Keep the door open After each wash cycle, leave the door open to allow air circulation and the drum to dry out completely. This helps prevent moisture buildup, which can lead to mold growth. 2. Remove wet laundry promptly Remove your wet laundry as soon as the washing cycle is complete. This prevents a moist environment that promotes mold growth. 3. Clean the detergent dispenser Regularly clean the detergent dispenser to remove any mold or residue that may accumulate. Use a soft brush or cloth to wipe away any build up. 4. Wipe down the door and rubber gasket After each use, wipe down the inside of the door and the rubber gasket to remove any moisture or residue. Pay close attention to the folds and crevices where mold can easily accumulate. 5. Use high-efficiency detergent Opt for high-efficiency (HE) detergent specifically made for front-loading washers. This minimizes soap residue and prevents mold growth. 6. Run an empty hot water cycle Periodically run an empty hot water cycle in your washing machine to kill any existing mold spores. This helps to keep your machine clean and prevent mold growth. 7. Avoid overloading the machine Avoid overloading your washing machine as it can hinder proper water circulation and lead to inadequate cleaning. This can create an environment conducive to mold growth. 8. Clean the filter Regularly clean the filter in your washing machine to prevent mold and odor. Follow the manufacturer’s instructions for proper filter maintenance. 9. Ensure proper ventilation Ensure there is proper ventilation in the laundry area by opening windows or using a dehumidifier if necessary. This helps to minimize moisture in the air and prevent mold growth. 10. Schedule regular maintenance Lastly, schedule regular maintenance for your washing machine to prevent mold growth and ensure optimal performance. Consult your manufacturer’s recommendations or contact a professional washing machine mold cleaning service for assistance. By following these preventive measures, you can significantly reduce the risk of mold growth in your washing machine. However, if you require professional assistance or notice persistent mold issues, it is advisable to contact a reputable mold removal company specializing in washing machine mold cleaning service. Conclusion Ensuring that your washing machine remains free from mold is essential for maintaining a clean and hygienic laundry environment. By following the cleaning and prevention tips mentioned above, you can effectively eliminate mold from your washing machine and prevent its recurrence. However, in cases where the mold problem persists or professional assistance is needed, it is recommended to consult a mold removal specialist or a reputable mold removal service. These specialists possess the expertise and tools necessary to thoroughly treat and eliminate mold from your washing machine, guaranteeing a safe and healthy laundry environment. To achieve the best results, be sure to choose the most reliable and trusted local mold removal service available to you. Remember, regular mold treatment and prevention measures are key to keeping your washing machine mold-free and maintaining optimal performance. By taking proactive steps to address mold growth, you can ensure that your laundry remains fresh, clean, and free from mold-related issues. FAQ Are there any safety precautions I should take when removing mold from my washing machine? Yes, it is important to wear protective gear such as gloves and a mask to shield yourself from mold spores. What are some effective cleaning solutions for removing mold from a washing machine? You can use a commercial mildew cleaner or create your own mixture using ingredients like hydrogen peroxide, lemon juice, distilled white vinegar, or bleach. How do I clean the rubber gasket, detergent dispenser tray, and drum of my washing machine? Thoroughly clean these areas using the cleaning solution and a soft cloth. Is it necessary to run a cleaning cycle with the mold-cleaning solution? Yes, running a cleaning cycle will help disinfect and clean the internal parts of the machine. How should I dry my washing machine after cleaning? After cleaning, wipe down the drum and door, and leave the machine open to air-dry completely. What preventive measures can I take to avoid mold growth in my …