Top Warning Signs of Mold Toxicity

Top Warning Signs of Mold Toxicity

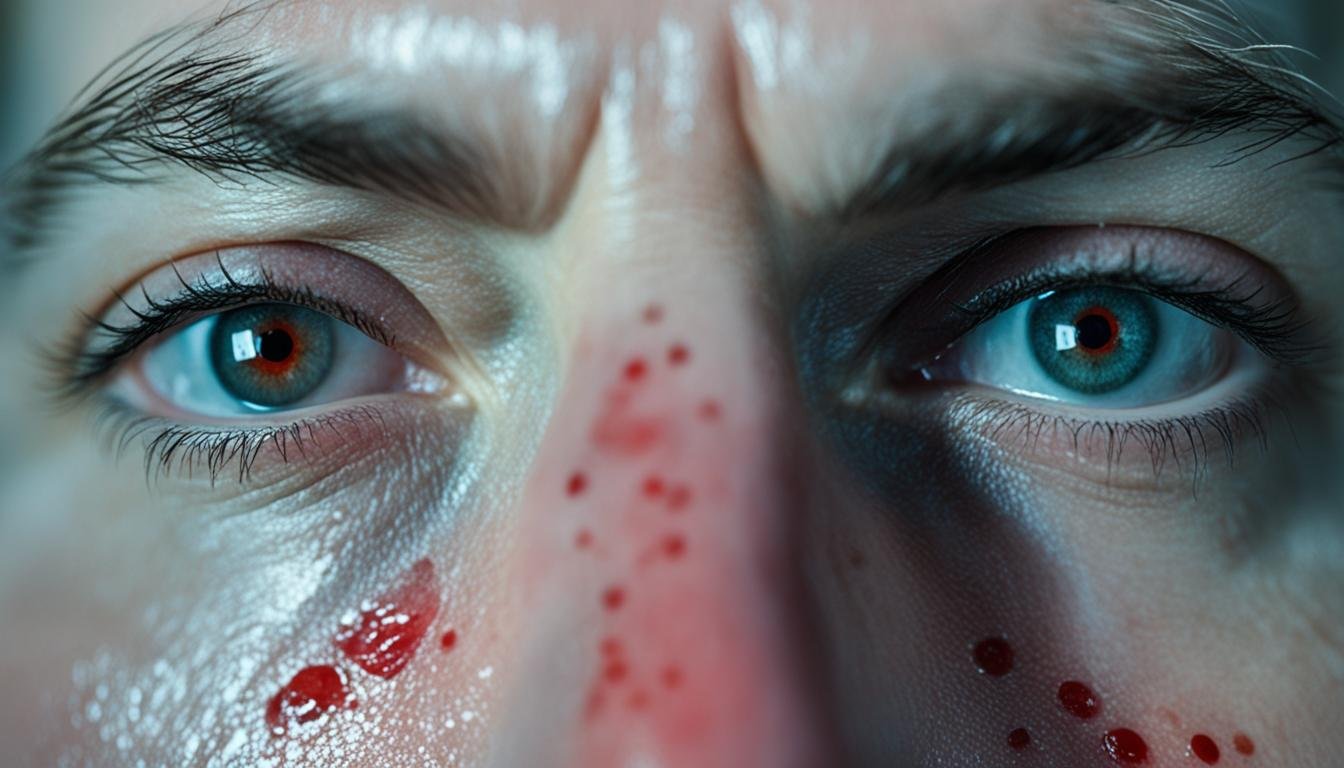
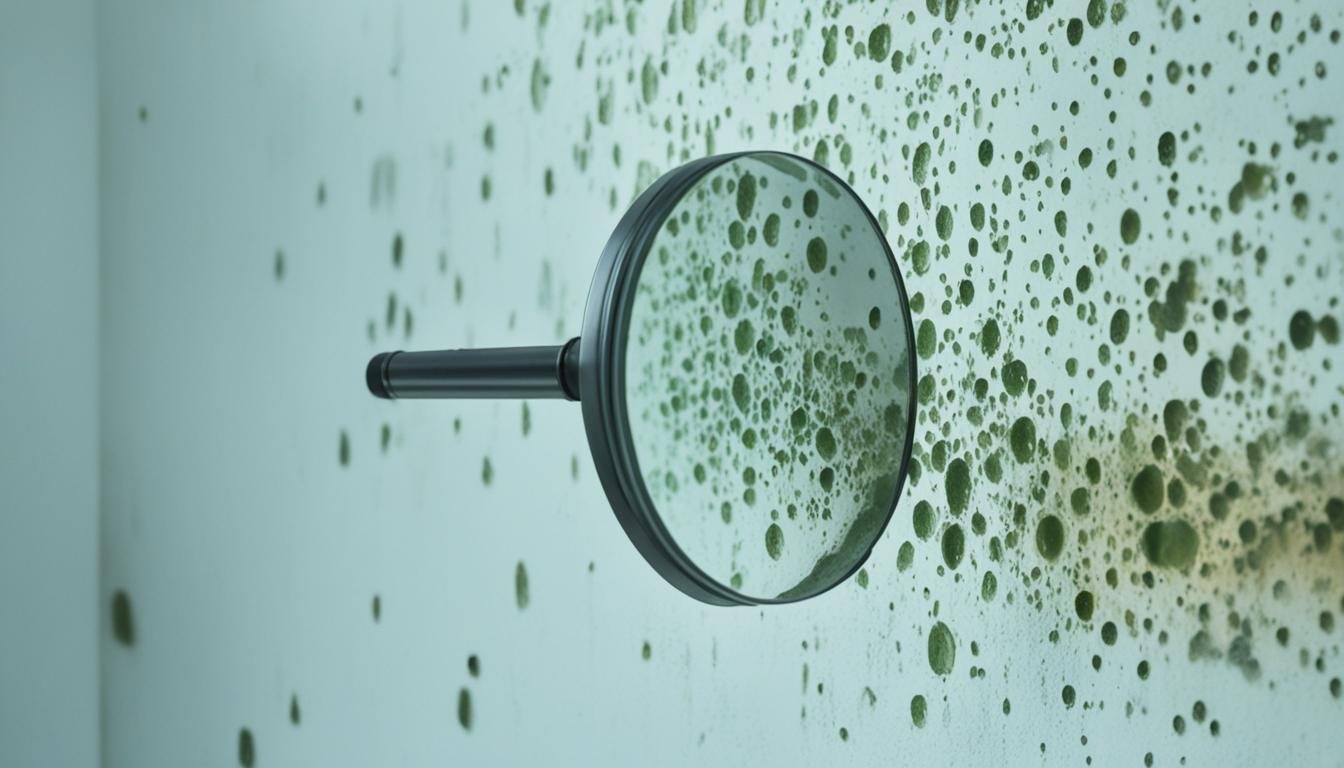
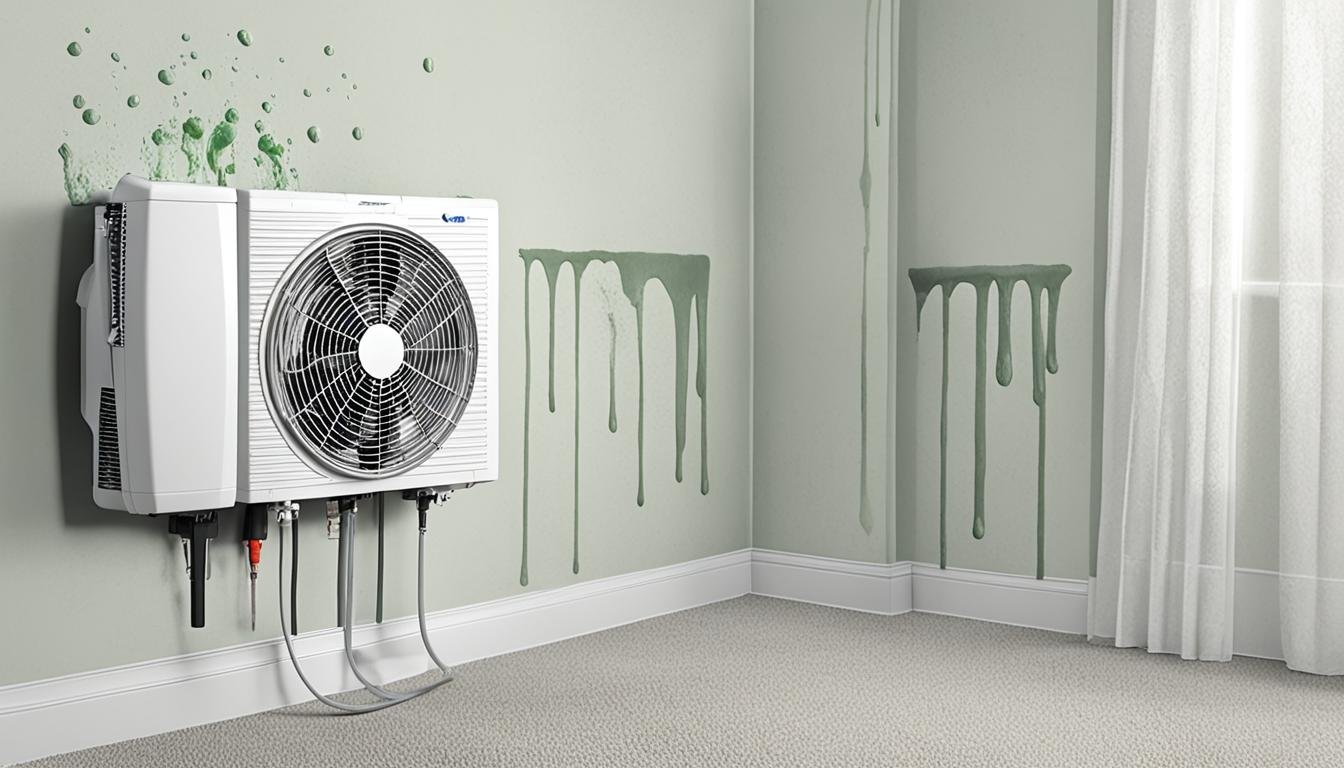
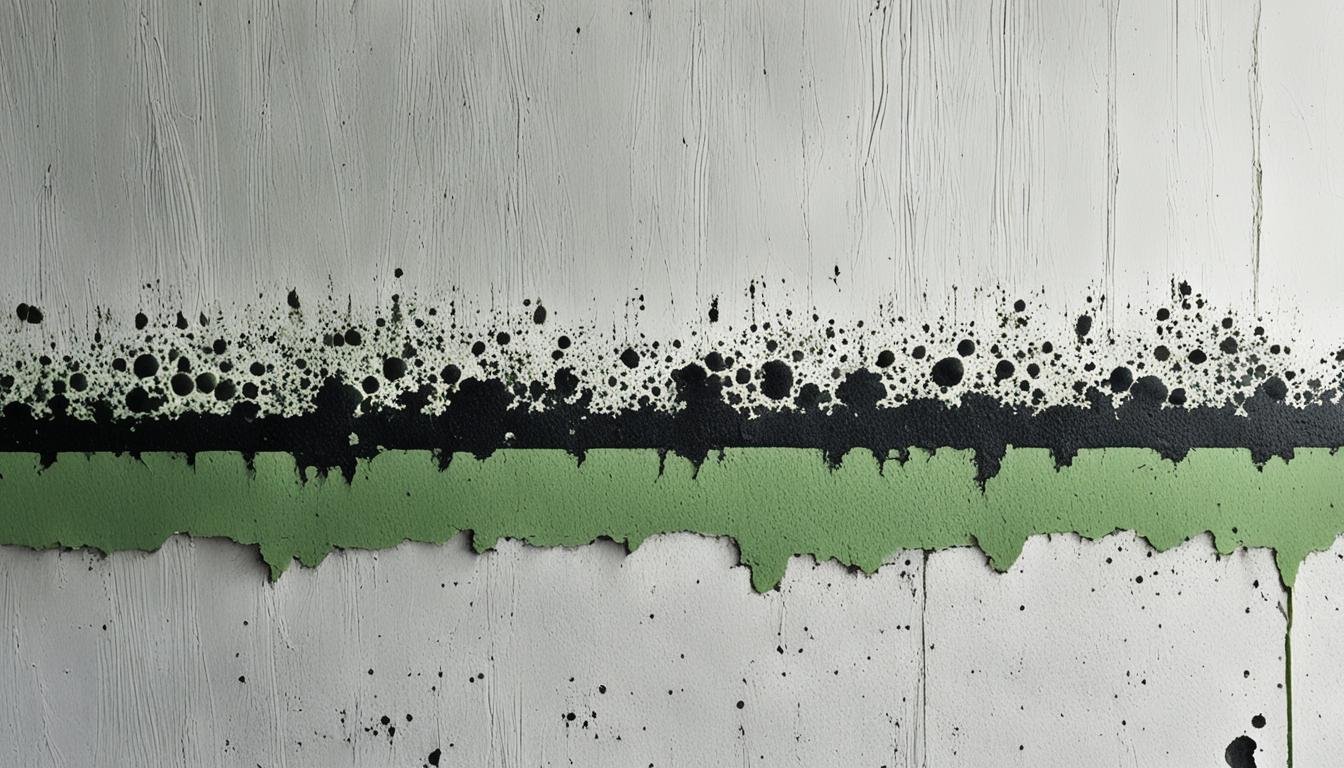
Do you know that mold health issues affect millions of Americans each year? This unseen threat might be in your home, work, or school. While some molds are safe, others make powerful toxins that harm our health. Being exposed to these toxic molds can cause severe health problems. These issues can start from a simple cough to serious lung infections. It’s key to know the main signs of mold toxicity. Common symptoms include allergies, breathing, and sinus problems. Also, people might feel tired, forgetful, and experience muscle pain. They can even have digestive issues and react differently to light. Anyone noticing these signs should take them seriously. Mold toxicity is often missed or wrongly diagnosed because these signs can mean many things. Key Takeaways Mold exposure can trigger a wide range of health problems, from allergies to neurological issues. Symptoms of mold toxicity often mimic other conditions, making it difficult to diagnose. Persistent or unexplained symptoms may be a sign of toxic mold exposure. Seeking evaluation from a mold-literate healthcare provider is crucial for proper diagnosis and treatment. Proactive steps like mold testing and remediation can help prevent the harmful effects of toxic mold. Common Symptoms of Toxic Mold Exposure Toxic mold can bring many troubling symptoms, affecting your health and well-being. You might notice mold exposure symptoms like brain fog, dizziness, or ear infections. Symptoms also include headaches, itchy eyes, and joint pain. A persistent cough or skin rashes could be signs too. Keep an eye out for these. Respiratory Issues If you find breathing hard or having a cough in certain places toxic mold illness might be the cause. Continued exposure to black mold health effects could lead to conditions like CIRS or biotoxin illness. Cognitive Impairment Exposure doesn’t just affect you physically; it can hurt your mind too. You may experience memory issues, struggle to focus, or feel mentally foggy. Such issues are often tied to sick building syndrome and can lower your daily productivity. Noticing symptoms or water damage‘s signs? It’s crucial to act fast. Connect with a professional service like San Bernardino Water Damage Restoration. They can check and fix the mold situation in your home or office. “Mold inhalation causes innate immune activation, neural, cognitive, and emotional dysfunction.” – Harding et al., 2020 Top Warning Signs of Mold Toxicity Finding the first signs of mold toxicity is vital for acting fast and seeking the right medical help. Mold can lead to a range of health issues. This includes breathing problems and trouble thinking. It can significantly affect how we feel and our health. Breathing issues are a big warning sign of mold toxicity. People might cough a lot, have a wheeze, or find it hard to breathe. These problems get worse when mold is disturbed, like during cleaning. Issues with memory and thinking can also point to mold toxicity. This might show up as forgetfulness, a hard time focusing, or feeling mentally cloudy. These issues can really affect how well we do our daily activities or work. Mold toxicity might not just stop at breathing and thinking problems. Some folks might be very tired, have sore muscles or joints, or get headaches. Others might have stomach problems like nausea or diarrhea. Skin rashes, sinus infections, and vomiting can also happen. Remember, not everyone shows the same symptoms from mold. How mold affects you could depend on your genes and how much mold you’ve been around. If you think mold might be making you sick, it’s wise to see a doctor who knows about mold-related health issues. For finding and dealing with toxic mold, it’s best to get help from a certified expert. Whether it’s a mold inspector or a mold removal service like those found at San Bernardino Water Damage Restoration or Water Damage Pros. They can check your home for mold, tell you how bad it is, and help you take the right steps to fix it. Staying alert to the early signs of mold and acting quickly is key. By doing this, we help protect our health and improve our life quality. “Mold can grow in hidden places like behind walls or attic insulation, and it prefers dark and humid environments.” Symptom Percentage of Affected Individuals Respiratory Issues Up to 80% Cognitive Impairment 60-75% Fatigue 70-90% Muscle/Joint Pain 60-80% Headaches 75-90% Many people show these symptoms, highlighting how crucial it is to spot mold toxicity early. Getting help right away can prevent serious health issues. It lets you take back control of your well-being. Mold Exposure vs. Mold Colonization Mold exposure and mold colonization are different, but related, challenges. Exposure means you’ve encountered mold spores in your space. This could happen through breathing them in, touching them, or even by eating them. These spores might make you sick as your body reacts to them. They produce toxins that can cause a variety of health problems. On the other hand, mold colonization is when mold starts growing inside you. It can live and multiply, especially in your lungs but sometimes in other parts of your body. This is a very serious health issue. It’s worse than just the toxins making you sick – the mold is actually living in you. This can happen if your immune system is not strong enough to fight it off. If you’re around mold and you’re constantly feeling unwell, don’t ignore it. Seeing a doctor is very important to stop mold from colonizing your body. If not treated, it can lead to very severe health conditions, including autoimmune diseases. Recognizing the difference between exposure and colonization is crucial. Addressing this problem early can help you avoid serious health complications. By seeking prompt medical care and removing mold, you can detox your body. This will help you get better and avoid major health issues. Don’t take the risk with toxic mold. Stay on top of your home’s mold problem and make a plan for recovery. Your health is too important to gamble with. FAQ What are the top …

Tools for Detecting Mold in Walls

Tools for Detecting Mold in Walls

Mold can grow even in temperatures as low as 40 degrees Fahrenheit. This highlights the need to find and deal with mold early. Doing so can prevent damage to your home and keep your family safe. Luckily, there are many tools available to spot mold in your walls, which helps you act fast. A moisture meter is a great tool to find mold. It shows you where there’s too much moisture, perfect for mold to start growing. This tool lets you find exactly where mold might be and helps you solve the problem. Thermal imaging cameras also help with mold detection. They pick up on temperature changes in your walls, a sign of moisture and potential mold. With a thermal imaging camera, you can find mold that’s hidden to the naked eye. Mold testing kits are also out there for homeowners. You can take samples from areas you suspect have mold and send them to a lab for testing. When you know what kind and how much mold there is, you can figure out the best way to get rid of it. However, keep in mind that just taking samples doesn’t have a clear recommendation from the CDC. It can be costly, and the results can be hard to understand. For the most reliable advice, consider talking to a professional mold inspector. They can offer expert help and make sure there’s no hidden mold in your home. Key Takeaways Moisture meters, thermal imaging cameras, and mold testing kits are effective tools for detecting mold in your walls. Consulting a professional mold inspector is recommended for a comprehensive assessment and personalized guidance. Addressing mold issues early can prevent structural damage and health risks to your family. Proper personal protective equipment, such as respirators and gloves, is crucial when removing mold. Biomatrix Mold Monitor and Mold Test Company offer reliable mold detection and remediation services. Importance of Detecting Mold in Walls Finding mold is key to staying healthy at home. If left, it can cause health issues like allergies, breathing problems, and more for those with weak immune systems. So, catching and fixing mold in walls early is vital to keep your family safe. Why Mold Detection is Essential Mold loves wet areas and can quickly damage your home’s structure. It can be very bad for your health too. For example, black mold makes toxins that can lead to breathing problems, brain troubles, and in extreme cases, death. Common Signs of Mold in Walls Musty odors – A damp, musty smell might mean there’s mold inside walls. Discoloration – Seeing odd spots or stains on walls or baseboards could be mold. Water stains – Stains on ceilings or walls point to hidden moisture that can cause mold. Leaks – Any leaking water, like from pipes or a roof, can help mold grow in walls. Respiratory problems – Breathing issues without a clear cause might be from mold. Dealing with mold quickly is a must. It grows fast and can move through your whole house. A good plan is to check for it often and use tools like moisture meters and testing kits. Keeping your home dry, fixing leaks, and ensuring good airflow helps stop mold and keeps your family healthy. Professional Mold Detection Methods Spotting mold in walls calls for special know-how and gears. Pros use diverse methods to find out where, and how much mold there is. They rely on things like infrared thermography, moisture meters, and air samples. Infrared Thermography: With infrared cameras, pros can see hot and cold areas. These differences may signal places where moisture hides, which is where mold likes to grow. Such cameras help locate these potential trouble spots. Moisture Meters: Knowing how wet walls are is key in fighting mold. Pros have special tools to find the damp spots. This step is crucial in the fight to stop new mold from forming. Air Sampling: Sampling the air indoors is a good way to count mold parts. By measuring the mold levels inside and out, pros can realize how bad the contamination is. This helps them make a plan to fix it. Using these tools properly means getting the job done right. This keeps your indoor spaces healthy for everyone. Trust top services like San Bernardino Water Damage Restoration for the best mold detection and cleanup help. “Finding mold the right way is step one to solving a mold problem. These tools let us find exactly where mold is, helping us clean it up for a safer home.” – Mold Inspection Expert, Water Damage Pros DIY Tools for Mold Detection Finding mold in your walls doesn’t always mean you need a pro. You can use DIY tools to catch mold early. Visual inspections and mold testing kits are the go-to options. Visual Inspection To start, look at your walls closely. Check for discoloration, cracks, or wet spots. These are signs mold might be growing. Areas like bathrooms and basements are common hiding spots for mold. Seeing mold with your eyes is just the first step. Mold can hide behind walls or under floors. In these cases, you might need a different method to find and understand the mold problem. Mold Testing Kits A mold testing kit is a more in-depth option, and you can get one from the Water Damage Pros website. These kits let you take samples and send them to a lab. Then, you’ll know what kind and how much mold is in your house. Follow the kit’s instructions carefully for accurate results. You’ll need to take samples from different places and mail them out. Some kits, like the My Mold Detective MMD103 Mold Test Kit, include surface testing tape for better results. While testing kits are handy, they might not show the whole mold situation. Results can change based on where you take samples. For the best look at your mold problem, consulting with a professional might be a good idea. They have more tools and knowledge to find all the mold …

Identifying the Smell of Black Mold

Identifying the Smell of Black Mold

The CDC says 47% of US homes have high mold levels, including black mold. It’s known to be a serious and common type of mold. Black mold smells musty, like dirt, and can be noticed early, even if you can’t see it. This smell warns you that mold might be growing somewhere in your home. Key Takeaways Black mold has a strong, musty odor that is often described as similar to rotting wood, paper, or dirty socks. The mold’s odor can be detected before the growth becomes visible, providing an early warning sign. Moisture is a key factor in black mold growth, and homeowners should be vigilant for any water damage or damp areas. Hiring professional mold inspection and remediation services is recommended, especially for larger infestations, due to the health risks associated with black mold. Regular home inspections and prompt action to address any musty odors can help prevent the spread of toxic black mold. Understanding the Odor of Black Mold The musty, earthy smell from black mold is hard to miss. It’s often the first clue something is wrong, even before you see the mold. This smell comes from certain compounds that mold releases into the air as it grows. Many say it smells like damp and stale things or even sweaty socks. The Musty, Earthy Scent Not everyone smells the black mold right away. Some may notice it quickly while others don’t. But, if you do smell it, it’s a big warning sign. It means there’s likely a moisture problem helping the mold grow. It’s vital to fix any leaks, boost ventilation, and keep the air not too humid inside. This tackles the bad smell and keeps the mold away. These steps also make the air better to breathe. For help fighting mold smells and related issues, check out sanbernardinowaterdamagerestoration.com or talk to the pros at Water Damage Pros. “The smell of black mold is often the first sign that a problem exists, even before the mold is visible. This musty, earthy scent is a clear indicator that immediate action is needed to address the underlying moisture issues and prevent further mold growth.” Identifying the Smell of Black Mold If you smell something musty at home, check areas that often get wet. Bathrooms, kitchens, and basements are prime spots. Black mold grows there and gives off a strong, musty scent. Mold starts forming quickly, sometimes in just 24 hours. This makes your home smell like mold fast. Any kind of mold can be bad for your health, says David Harley. Each mold type smells a bit different. For example, black mold often smells like a damp basement or rotten leaves. Mold smells linger and spread if you don’t deal with the mold soon. If you can’t find where the smell is coming from, get a professional mold inspector. They can test your air quality. Finding and removing black mold quickly is important for a safe home. Signs of Mold Growth Musty smell Dark-colored tile grout Warped drywall Air conditioning or heating unit smelling weird Peeling wallpaper Dark spots on walls Causes of Black Mold Black mold needs water and a place to grow, like wood or paper. It thrives in dark, humid spaces. Susceptible Areas for Mold Infestation Health Effects and Symptoms Carpets Wood doors Baseboards Drywall Wallpaper Any water-permeable areas Coughing Wheezing Headaches Psychiatric issues Brain damage Joint pain Loss of mobility Act fast if you find black mold. Water Damage Pros and other pros can safely clean it up. This keeps you and your family safe. “Immediate response from certified professionals is crucial for limiting mold damage and restoring homes to pre-damage conditions.” Health Risks of Black Mold Exposure Black mold can seriously impact your health, mainly affecting your breathing. It makes asthma worse and causes sneezing, coughing, and watery eyes. This happens even if you don’t have asthma. If you’re allergic to mold or have a weak immune system, you’re at higher risk. Being around black mold for a long time can cause big health problems. It links to pain in your joints and muscles, trouble with your stomach, and feeling tired all the time. It might make you forget things, feel anxious, or be sad. So, finding and getting rid of black mold quickly is very important. Potential Health Effects Respiratory issues, including asthma symptoms Mold allergies, leading to sneezing, coughing, and congestion Compromised immune system, increasing susceptibility to illness Joint and muscle pain Gastrointestinal problems Chronic fatigue and brain fog Anxiety and depression If you think you have black mold at home or where you work, don’t wait to fix it. Getting help from experts at sanbernardinowaterdamagerestoration.com or Water Damage Pros is key. They can find and clean up the mold. This stops the health risks it brings. “Mold exposure can lead to a range of respiratory issues, from worsening asthma symptoms to triggering allergic reactions in those without the condition. Prompt action is crucial to protect your health.” Conclusion The musty, earthy smell of black mold tells us it’s close, even if we can’t see it yet. Knowing this smell helps us find the mold early. This discovery is vital to stop the mold from spreading in your house. Finding and fixing the damp problems, and taking care of any mold we find, are very important. This protects our family’s health. Water Damage Pros in San Bernardino, CA offer full mold remediation services. They look for mold, test it, and then get rid of it, ensuring your home is safe to live in. They also use great moisture control strategies and mold prevention tips to keep your home fresh and mold-free. To learn more or to set up an appointment, give them a call at 951-903-5429. Or, you can visit sanbernardinowaterdamagerestoration.com. They are ready to help you with all your mold issues. FAQ What is the distinctive smell of black mold? Black mold is known to have a musty, earthy smell. It’s often described as rotting vegetables or plants. Some …

Common Mold Types from Water Damage

Common Mold Types from Water Damage

Mold can grow in your home within 24-48 hours of water damage. This fast growth shows how important it is to deal with water damage at once. Mold loves dark, wet areas. It releases harmful spores into the air. This can be very dangerous, especially for those with asthma. The most common types of mold in wet homes are black mold, Aspergillus, Cladosporium, and Alternaria. Getting help quickly from experts is key to solving mold problems and making your home safe again. Companies like Water Damage Pros – San Bernardino can offer professional services. Key Takeaways Mold growth can start within 24-48 hours after water damage occurs. The most common indoor mold types after water damage include Stachybotrys, Aspergillus, Cladosporium, and Alternaria. Mold exposure can lead to a variety of health issues, especially for individuals with underlying conditions. Prompt professional mold remediation is crucial to address the problem and prevent further damage. DIY mold removal is not recommended due to the potential dangers and risks of incomplete removal. Identifying the Four Most Common Mold Types After Water Damage After water damage, harmful mold quickly becomes an issue needing fast action. Of the many types that thrive in wet places, four are usually seen after water comes in: Stachybotrys chartarum (black mold), Aspergillus, Cladosporium, and Alternaria. Stachybotrys Chartarum (Black Mold) The dangerous black mold, also called Stachybotrys chartarum, is a black-green fungus. It loves surfaces like paper, fiberboard, and drywall. It needs ongoing moisture to live, so it shows up in wet places. This toxic mold can seriously harm health, especially for those with weak immune defenses. Aspergillus Aspergillus is a common mold that often looks black but with yellow or white. Coming into contact with Aspergillus may cause various breathing issues and infections. It’s especially risky for people with lung or immunity problems. Quickly finding and removing mold is vital after water damage. This keeps harmful fungi from spreading and protects people living there. The San Bernardino Water Damage team is skilled at fixing water damage, identifying mold, and removing it safely. Common Mold Types from Water Damage Apart from black mold and Aspergillus, homes with water damage face other mold risks too. Cladosporium, Alternaria, and Penicillium are among these hazards. They all need quick identification and removal due to health issues. Cladosporium appears like olive-green patches. It starts small but can grow over time. This mold loves damp spots in areas like bathrooms and under sinks. Alternaria looks velvety and comes in various shades, from green to black. It sometimes comes inside from outdoors, landing in walls, carpets, and attics. Then, there’s Penicillium, also from water damage. It thrives on decaying things and damp settings. This one is known for causing breathing trouble like asthma and bronchitis. The EPA recommends dealing with mold over 10 square feet with a pro. 1-800 WATER DAMAGE and others offer expert services to rid your home of mold. Their help is crucial for a safe home. “Mold can establish and grow in areas with high humidity and excess moisture, posing significant health risks if left unaddressed. Proper identification and prompt remediation are crucial for maintaining a healthy indoor environment.” Knowing about mold types from water damage helps protect families. Working with experts like those at 1-800 WATER DAMAGE ensures a thorough, safe cleanup. It’s vital for indoor air quality. Conclusion Dealing with mold quickly is key to keeping your home and health safe after water damage. Indoor mold, such as black mold, Aspergillus, Cladosporium, and Alternaria, can be very dangerous. It’s crucial to act fast and get professional help from experts like Water Damage Pros – San Bernardino. Knowing the early signs of mold can make a big difference. Reliable action and regular checkups on your home’s moist areas, airflow, and managing water damage are essential. Thanks to teams like Water Damage Pros in Norristown, PA, residents can fight mold and make their homes safe again. Spending on expert Mold Removal and Mold Remediation services is wise. It ensures mold is gone, your family’s health is safe, and your home’s value is kept. Putting effort into mold prevention and quick water damage solutions helps keep your place clean and worthwhile for the future. FAQ What are the most common types of mold found in water-damaged homes? In water-damaged homes, you often find indoor molds like black mold or Stachybotrys chartarum. Aspergillus, Cladosporium, and Alternaria are also quite common. What is Stachybotrys chartarum (black mold) and why is it a concern? Black mold, or Stachybotrys chartarum, is a greenish-black fungus. It loves to grow on things like paper, fiberboard, and drywall. It needs continuous moisture. This type of mold is toxic. It can really harm your health, especially if you are already sick or have a weak immune system. What are the health risks associated with Aspergillus mold? Aspergillus, another indoor mold, can make you very sick. If your immune system is weak or you have lung problems, be careful. It can cause a range of lung and breathing diseases known as aspergillosis. What other types of mold can be found in water-damaged homes? Other molds in wet houses include Cladosporium and Alternaria. Cladosporium is olive-green and often seen around faucets. Alternaria looks velvety and comes in shades of green, gray, or black, with fuzzy parts. Source Links https://reynoldsrestoration.com/news/types-and-causes-of-mold-in-a-home/ https://www.bobvila.com/articles/water-damage-vs-mold/ https://www.servicemasterrestore.com/servicemaster-restoration-by-rsi-oklahoma-city/why-us/blog/2021/february/types-of-mold-from-water-damage/ https://restoration1.com/minnetonka/blog/different-types-of-mold-to-look-out-for-after-water-damage/ https://cfrsfl.com/blog/top-4-types-of-mold-to-look-out-for-after-water-damage/ https://yourmoldsolutions.com/blog/top-4-types-of-mold-to-look-out-for-after-water-damage/ https://www.1800waterdamage.com/identifying-mold-types/ https://rainbowrestores.com/blog/mold-identification https://bioterrasolutions.com/blog/6-types-of-harmful-mold/ https://www.gpinspect.com/article/what-to-do-water-damage-mold/ https://www.airpf.com/water-damage-vs-mold/ https://www.puroclean.com/schwenksville-pa-puroclean-lansdale/blog/types-of-mold/

Detecting Mold After Water Damage

Detecting Mold After Water Damage

Mold doesn’t waste time and can appear within 24-48 hours after a water issue. It’s a quick moving foe. It might not show itself right away. It loves to hide, sneaking behind walls, under carpets, or in ducts. This hidden growth can be bad news for your house and your health. Spotting mold early means looking for those musty smells and odd spots on your walls or floor. Knowing what mold can do to your health is super important. It helps catch the problem before it gets worse. Key Takeaways Mold can start growing in as little as 24-48 hours after water damage. Mold can grow in hidden areas like behind walls and under carpets. Musty odors and visible discoloration are signs of mold growth. Mold exposure can cause allergic reactions and respiratory issues. Professional mold testing and remediation services are recommended. Identifying the Signs of Mold Growth After water damage, spotting mold early is key. A musty smell often indicates mold is nearby. You might notice musty scents before seeing any mold. Watch for walls, floors, or ceilings that change color. Mold can be many colors, from black and white to green, pink, or orange. If paint or wallpaper starts to peel, bubble, or crack, it could be due to hidden mold. Mold grows quickly, often within 24 to 48 hours of a leak or flood. Health Symptoms Associated with Mold Exposure Mold can cause a lot of health problems, especially for those with allergies or asthma. If you feel itchy, sneeze a lot, have a runny nose, or get headaches at home, mold could be the cause. People with asthma face even worse symptoms near mold. They might experience severe breathing issues, anxiety, depression, and weakened immune systems. “Nearly 5 million people in the U.S. have asthma attributed to mold exposure.” Acting fast against mold is a must after water damage. Professional help is the safest way to handle mold and keep your home healthy. Detecting Mold After Water Damage After water damage, spotting molds fast is key. They start growing in 24-48 hours if places stay wet. It’s vital for homeowners to act quickly to prevent mold from spreading, which could cost a lot to fix. To find molds, start by looking and smelling. Check for discolored patches in moist areas. Also, if the place smells musty, it could mean there’s mold. Use moisture meters to find wet spots; these are places that mold loves. Homeowners can do some checks, but pros might be needed. They come equipped with tools to test for mold types. They can take samples for lab tests too. This helps with dangerous molds like black mold, as it needs special handling. Choosing experts like Water Damage Pros is smart. They know how to check for mold, create a plan to remove it, and make your home safe. Trusting them can bring your home back to a mold-free state. “Addressing mold issues early saves money compared to extensive mold remediation.” Acting fast on mold post-water damage is a wise move. This can reduce health risks and costs. Regular checks and quick steps keep your house safe and nice, protecting its worth and comfort. Conclusion Dealing with mold after water damage is key to your home’s safety. Look out for mold signs like musty smells, visible stains, and health issues. Fast action helps prevent mold from spreading. Professionals can identify and solve these problems, keeping your home safe. Mold can harm your home and health quickly, so act fast. Checking your home often and controlling moisture stops mold before it starts. Trusting experts, like Water Damage Pros, protects your home from destructive mold and water damage effects. Keeping your living space free of mold is vital for your family’s health. Be alert for any mold signs and get professional help. This way, you stop mold early and enjoy a safe, healthy home for many years. FAQ What are the signs of mold growth after water damage? If you smell something musty, see discoloration on surfaces, and notice paint or wallpaper peeling, mold may have started growing. How can mold exposure affect your health? Mold can cause itchy eyes, a runny nose, and coughing. It might also lead to sore throats, headaches, and make people sensitive to its toxins feel even worse. How can you detect mold after water damage? Mold detection involves looking for signs like visible mold or a musty smell. You can also use tools to measure moisture. Professional tests can confirm mold and its type. Why is it important to address mold growth after water damage? Quickly addressing mold is vital to keep your home safe. Mold can become an issue within 24-48 hours of water exposure. Experts can identify and remove mold, making your home healthy again. Source Links https://www.puroclean.com/centennial-co-puroclean-certified-restoration-specialists/blog/how-to-check-for-mold-after-water-damage/ https://www.angi.com/articles/how-to-check-for-mold-after-water-damage.htm https://greenworksllc.com/mold-after-water-damage/ https://jenkinsrestorations.com/how-to-prevent-mold-after-water-damage/ https://cfrsfl.com/blog/top-4-types-of-mold-to-look-out-for-after-water-damage/ https://www.bobvila.com/articles/water-damage-vs-mold/ https://unitedwaterrestoration.com/blog/how-to-arrange-for-mold-inspection-testing-after-water-damage/ https://dryeffect.com/how-to-check-for-mold-after-water-damage/ https://superiorrestore.com/how-to-test-for-mold/ https://www.gpinspect.com/article/what-to-do-water-damage-mold/ https://inspectca.com/mold-inspections-after-water-damage-what-you-need-to-know/ https://callservicefirst.com/mold-in-the-shadows-detecting-and-addressing-hidden-mold-in-your-home/

Drying Under a House After a Leak

Drying Under a House After a Leak

Did you know things dried in 48 hours stand a better chance of being saved from damage? This fact shows how vital quick action is with water damage. Time is truly of the essence. If water damage is in your crawl space or basement, mold and costly repairs can quickly follow. To fix this, acting fast and using the right drying methods is key. It’s all about minimizing the damage as much as possible. Key Takeaways Belongings that can be dried within 48 hours have a higher chance of being saved from water damage. Using a dehumidifier can help dry out the space and belongings quickly, aiding in the restoration process. Removing water-damaged items from the affected area can facilitate a faster drying process. Proper air circulation and ventilation are crucial for effective moisture removal. Seeking professional assistance may be necessary for severe water damage cases to ensure a thorough and safe cleanup. Assessing the Water Damage Situation First, you need to figure out the water damage under your house. Find where the water is coming from. Also, check what type of damage the water has caused. Doing this helps choose the right way to fix things. Identifying the Water Source Start by finding the water’s source. This could be from leaky pipes, broken appliances, or bad weather. Knowing where it comes from helps stop more damage. Determining the Category of Water Damage Water damage falls into three categories: clean water damage, gray water damage, and black water damage. Each one needs a different cleaning method. Clean Water Damage: This is from a safe source like rainwater. It’s the least risky type and can often be fixed by you. Gray Water Damage: Comes from items like washing machines. It contains some dirt and may need help from pros. Black Water Damage: The most dangerous type comes from sewage. It’s very harmful to your health. Experts must handle it. Figuring out the source and type of water damage is key. It leads to using the right methods, which keeps you safe and reduces damage. “Understanding the water source and damage type is essential for a successful restoration.” Drying Under a House After a Leak Once the water damage has been checked, it’s time to start drying. This step includes removing excess water, improving air flow, and using dehumidifiers. Also, it involves placing desiccants to help dry the area. Removing Excess Water To start, get rid of any standing water. You can do this by hand or with special tools like a sump pump. If you need to buy one, it can cost over $100, but they rent for about $44 a day. If you act quickly, items can often be saved within 48 hours. For example, you can freeze wet books and photos. But make sure to put them in a plastic bag first to stop mold. Increasing Air Circulation Good air flow is key in the drying phase. You should open windows and doors and set up fans. Large industrial fans are especially good for drying out big areas fast. These fans can range from $50 to $500 if you’re buying. Renting them costs about $20 a day. Industrial fans dry walls, ceilings, and floors quickly and well. Using Dehumidifiers and Desiccants Dehumidifiers are great for removing moisture from the air. They come as portable units for around $270. For bigger jobs, industrial ones are available too. You can also use desiccants to soak up moisture. Silica gel and clay are common types. How long they last depends on how much they need to dry. To use dehumidifiers well, you need to watch the temperature and humidity. Also, be sure to place them in a spot where air can flow freely. Fixing water damage takes effort and time. But, hiring professionals can make it much easier. They know exactly what to do, have the tools, and reduce your worry about mold or damage. Preventing Further Damage and Mold Growth After the area is dry, it’s key to stop more damage and mold. Mold can grow in 24 to 48 hours if not cleaned up well. It often shows up as small black or white spots with a musty smell. Quick action is important because mold loves moisture and can cause health issues like sneezing and headaches. Cleaning and Disinfecting Surfaces To lessen mold danger, clean and disinfect all wet spots. A bleach solution or special mold products can help. This process kills bacteria and stops mold from spreading. Proper cleaning is extra important in bathrooms and by windows where leaks happen often. Monitoring Moisture Levels Always watch the moisture levels to avoid more damage or mold. Try to keep indoor humidity under 60%, a tip from the EPA. Dehumidifiers can make it hard for mold to grow. If the damage is bad, or you’re unsure what to do, call a pro like Water Damage Pros at 951-903-5429 or look at their website, sanbernardinowaterdamagerestoration.com. Statistic Value Time to Prevent Mold Growth 24 to 48 hours Mold Growth Time As quick as 24 hours Recommended Relative Humidity Below 60% Water Removal Rate 5-10 gallons per minute “Mold can begin to grow within 24 hours if the area is not completely dry.” Check outside your home often for pooling water which can point to a problem. If things can’t dry out, get rid of them quick to stop mold. Also, adding mold inhibitors to new drywall can help keep mold away. Doing these things to clean, disinfect, and watch moisture can stop more damage and mold. This keeps your place safe and healthy. Conclusion Drying a house after a water leak is key. It helps stop more damage and mold. Start by finding the water source fast. Then, check the damage and use good drying methods. This can save your things and keep your home solid. Always put safety first. Clean and disinfect the areas hit by water. Also watch the moisture to make sure everything dries right. If you need help, …

Repairing Water-Damaged Walls

Repairing Water-Damaged Walls

Did you know wet drywall can take up to three days to dry completely? Homeowners often deal with this as part of fixing water damage. This type of damage can happen from many sources, like a burst pipe or a leaky roof. It can cause issues such as mold and harm to the structure of the house. Fixing water-damaged walls is tough but needed for your house’s health. It might cost you at least $50 for small repairs. But, if the damage is bad, the price can go up fast. It may take a person over 2 hours to fix it if they know what they are doing. If the damage is big or involves black mold, it’s often wise to call a pro. The cost of professional help can vary. Yet, it’s usually a good idea for a solid and long-lasting repair. Key Takeaways Water damage can lead to a host of problems, including mold, mildew, and structural compromise. Repairing water-damaged walls can be a costly and time-consuming process, with the project cost starting at $50 for small sections. Dealing with water damage requires a thorough approach, as it can take up to three days for wet drywall to fully dry. While repairing water-damaged walls is an intermediate-level task, professional help may be necessary in certain situations. Addressing water damage quickly is crucial to prevent the issue from escalating and causing further damage to your home. Identifying and Addressing the Source of Water Damage The first step to tackle water damage is finding its source. Look out for Signs of Water Damage like loose paint, soft drywall, and musty smells. These can be hints water is getting in from outside. It might come through a leaky roof, a broken pipe, or from poorly sealed doors and windows. Locating the Leak or Moisture Source Finding where the water is coming from isn’t always easy. Water can spread far from the leak. To spot the leak, you might need to cut out damaged drywall. This gives a clearer look at what’s causing the issue. It could be a roof leak, a broken pipe, or even a dripping appliance. You need to find and fix the leak before repairing any damage. Addressing Mold Growth and Remediation If water damage goes unnoticed for too long, mold can start growing. Some molds, like “black mold,” are dangerous. Professional Mold Remediation is the best way to handle them. For small areas, you can clean the mold yourself. Just be sure to wear protective gear like gloves and a mask. Taking care of Indoor Air Quality is key for a safe home. Dealing with water damage quickly is vital. Plumbing Repairs and Home Inspections can stop the problem at the source. Sometimes, you might need experts for Water Leak Detection and Mold Remediation on complicated jobs. By fixing the main issue and any side problems, you can prevent lasting damage to your home. Repairing Water-Damaged Walls Repairing water-damaged walls starts with how bad the damage is. For small spots on the drywall, fixing it means cutting out the bad part and replacing it. Remove the damaged drywall, fit a scrap of 1-inch by 3-inch into the hole, and fasten a new piece on top. Step two is adding drywall tape and smoothing joint compound over the seams. Once that’s dry, sand and texture the area. This makes the repair invisible, blending it with the rest of the wall. If your wall has a lot of water damage, like needing a full new piece of drywall, you might want a pro to handle it. Big repair jobs are more complicated and may need special tools. Professionals will make sure it’s done right for a strong fix. Use Drywall Repair techniques for small sections of damaged drywall Incorporate Wall Patching methods to blend the new drywall with the existing wall Consider Drywall Installation for more extensive damage that requires a full sheet replacement Ensure proper Moisture Barrier techniques are used to prevent future water damage Consult professionals for complex Water Damage Restoration projects Acting fast on any water damage is key to preventing worse issues like mold. Using the right repair methods and being careful can bring your walls back to normal. It also helps keep your home safe from water damage problems in the future. “Water-damaged walls require prompt and thorough attention to prevent long-term structural issues and potential health hazards.” Preparing and Painting the Repaired Surface After fixing the drywall, the next move is to get it ready for paint. First, put a water-based primer on it. This helps the new paint stick correctly, stopping water damage. If the wall has a texture, add a matching spray texture according to the instructions. Make sure the repaired area is dry before painting. Opening windows and working in a space with good airflow is important. This makes the paint dry well and lessens any moisture problems. Choosing the right paint is key for interior walls. Pick a top-quality, waterproof paint for a good finish. Put on two coats for a full covering. Blend the paint well with the rest of the wall. If needed, use a technique for wall texturing to match the old finish. Protect yourself when applying the primer and paint. Wear a mask, gloves, and goggles. And always work in a space that has plenty of fresh air. These steps make sure your home project goes well. You’ll have your walls looking as good as new. Step Description 1. Apply Primer Apply a water-based primer/sealer to the repaired area to help the new paint adhere properly and prevent future water damage. 2. Texture the Wall If the wall has a textured finish, apply a matching texture spray according to the manufacturer’s instructions. 3. Paint the Repaired Area Use a high-quality, water-resistant paint and apply two coats for full coverage, blending the edges seamlessly with the surrounding wall. 4. Prioritize Safety Wear a mask, gloves, and eye protection, and ensure the work area is well-ventilated …

Drying Wet Interior Walls

Drying Wet Interior Walls

Did you know drywall can soak water up to 30 inches? This means water can really damage your walls after a leak. It is vital to dry them quickly to avoid lasting harm and mold. This article will cover the effects of water damage on walls. We’ll provide tips for drying on your own. Plus, we’ll talk about how pros tackle the problem. Key Takeaways Drywall is highly absorbent, and water can wick up the wall up to 30 inches. Quick drying is essential to prevent mold growth and structural damage. Ventilation, air circulation, dehumidifiers, and desiccants can help dry small damp areas. Professionals use specialized equipment and techniques for efficient wall drying. Wet insulation and wall coverings may need to be removed during the drying process. Understanding Water Damage in Walls Water damage is a big problem for homeowners. Understanding how water gets into drywall and the signs it leaves is key. When water starts from the ground, it spreads across the floor. Capillary action makes it travel up the walls too. How Water Saturates Drywall Drywall can soak up water up to 30 inches high. This causes dampness on both sides. Inside moisture is usually more due to less air. This moisture can weaken your walls if you don’t fix it fast. Signs of Water Damage in Walls You might see signs of damage, or the wall might look fine. Look out for: Black patches or streaks on the plaster Warped wood Cracks or blisters on wallpaper Rusted spots on metal stud walls Dissolved, chipped, or bowed spots on brick or stone Act quickly when you see water damage. The longer you wait, the worse the problem gets. Find the water source and fix it to stop more damage. Water in walls can harm a building’s structure and grow mold. It’s important to know how water spreads in walls. And to spot signs of damage early. This helps keep your home safe and saves money on repairs. DIY Methods for Drying Wet Interior Walls Dealing with wet interior walls doesn’t need to be tough. You can dry damp areas and stop more harm with DIY methods. Here, we’ll look at some ways to bring your walls back to dry, healthy conditions. Ventilation and Air Circulation To start drying wet walls, focus on air circulation. Open windows and doors to let in fresh air. Use fans to keep air moving against the damp walls. This helps drywall or plaster lose moisture faster. Using Dehumidifiers and Desiccants Dehumidifiers are great for pulling moisture from the air. A high-capacity one can handle big areas with a lot of moisture. For smaller spots, a standard room-size dehumidifier works well. Besides dehumidifiers, desiccants like clay cat litter or calcium chloride absorb moisture. Put them close to damp walls to help dry them out faster. These DIY solutions work for light water damage. But for serious issues, it’s smart to seek help from a pro. They can give expert advice and use special tools for a thorough fix. “Proper ventilation and the use of dehumidifiers and desiccants are key to effectively drying out wet interior walls through DIY efforts.” Drying Wet Interior Walls Professional Techniques and Equipment Restoration experts use special tools and methods to dry soaked walls. They first check how wet the walls are with a moisture measurement tool. An infrared imaging (IR) camera is then used to find water in hidden spots. High-capacity air movers are placed to blow away the surface water. Low-grain refrigerant dehumidifiers then lower the moisture in the air. This process ensures the walls are completely dry before fixing them. Dealing with Insulation and Wall Coverings If the walls have insulation or moisture barriers, these might have to be taken out. Certain insulation types like foil-backed or Styrofoam could need replacing. This is done to make sure the area dries properly. The drying equipment runs non-stop. Professionals check the walls each day to ensure they are dry. This thorough process is vital for stopping water damage and mold. Professional Drying Techniques Cost Estimates Moisture Measurement Tools $100 – $500 Infrared Imaging Cameras $1,000 – $5,000 High-Capacity Air Movers $50 – $150 per unit Low-Grain Refrigerant Dehumidifiers $230 – $500 per unit Insulation Replacement $500 – $2,000 Wall Covering Removal and Repair $250 – $750 Drying the walls can take 3-5 days, but severe cases might need weeks or months. The time it takes depends on the harm’s level. “If the drywall has been wet for more than 48 hours, mold growth may have already started. Depending on the type of water damage, it may not be safe to handle repairs yourself. Clean water damage from a burst pipe is manageable, but damage from grey or black water may contain toxic materials.” Professionals and their specialized tools are key for successful Professional Wall Drying. Without them, it’s easy to accidentally cause more damage or risks. Conclusion Drying wet interior walls fast and right is key to stop more damage and mold. If you can’t dry the walls well yourself, it’s best to get help. Call a professional water damage restoration company, like Water Damage Pros – San Bernardino. Their skilled team has the right gear and knowledge to dry the walls fully. They check for hidden moisture and make sure the walls are truly dry before fixing them. It’s vital to act fast on wall drying importance to keep your home safe and save money. Not paying attention to mold prevention and structural damage avoidance can cause big problems. These include health dangers and shaky structures. Restoration company expertise offers peace of mind. You know they’ll do a good job, safeguarding your home value and its future. Time is crucial when dealing with wet walls. Acting fast and getting expert help can prevent more damage. It also helps get your home back to the best shape possible. FAQ How does water saturate drywall? Water moves up walls through capillary action, sometimes reaching 30 inches. This happens more …

Saving a Wet Drywall Ceiling

Saving a Wet Drywall Ceiling

Recently, a discussion on saving a wet drywall ceiling caught the attention of 5,000 people. This highlights how common and important this issue is for many homeowners. Issues like a leaky pipe, roof troubles, or excess moisture can severely damage drywall. Yet, it’s often possible to rescue the ceiling with a smart plan and stop further harm. Key Takeaways Identifying the source of the leak is the first crucial step in addressing a wet drywall ceiling. Stabilizing and containing the leak through emergency measures can help prevent further water damage. Allowing the damaged area to fully dry out is essential before attempting any repairs or restoration. Proper drywall repair and sealing techniques are necessary to ensure the ceiling’s structural integrity and prevent future issues. Seeking professional assistance may be advisable for severe water damage or complex leak sources. Identifying the Source of a Ceiling Leak Getting to the bottom of a ceiling leak is key to stopping it and avoiding more harm. Look closely at your ceiling. You want to find any wet spots, odd colors, or water drops. These can help figure out where the water is coming from. Locating the Origin of Water Damage Check the floor, walls, and attic above. You’re looking for the rain’s entry point. Use a moisture meter if you have one. It’ll show you where the most water is. This likely marks the leak’s location. Leaks can come from many places. Think overflowing sinks or leaky pipes. Bad roofing or full gutters are also common culprits. It takes a thorough look to find the real issue. Signs and Patterns of Moisture Intrusion Water Stains: Signal the first sight of damage, spreading if the leak continues. Peeling Paint or Wallpaper: Shows spots where water has damaged the finish. Sagging Ceiling: Reflects the weight of trapped water, weakening the structure. Mold or Mildew Growth: Tells you water has been there long enough for mold to thrive. Dripping Water: Means there’s an active leak, needing immediate action. Soft Spots: Identify areas that have absorbed enough water to feel soft or damp. Cracks or Blisters: Point to structural damage caused by water. Potential Causes of Ceiling Leaks Description Leaking Roof Missing or damaged roof tiles can let in water, causing severe damage to ceilings. Plumbing Leaks A burst pipe can rapidly damage ceilings from factors like cold weather or high pressure. Condensation Lack of fresh air can create moisture, affecting the ceiling’s strength and quality. Overflowing Gutters Clogged gutters spilling water can harm ceilings via soaked outer walls. HVAC Issues Poorly serviced heating or cooling units can leak, harming ceilings. Appliance Leaks Water leaks from appliances above may spoil ceilings in living spaces. Natural Disasters Intense weather can harm roofs or windows, letting in damaging water. Learning about ceiling leaks helps homeowners act fast to avoid more trouble. For big problems, it’s smart to get expert help. They can protect the ceiling and your home’s safety. Stabilizing and Containing the Leak When a roof is leaking, the first step is to stop the spread of water. This means acting quickly to keep the damage contained. You want to prevent as much harm to your house as possible. Emergency Leak Control Measures Once you find where the water is coming from, it’s time to act fast. You need to stop the water and start limiting the harm. Here’s what you should do: Shut off the water supply: Find the main valve for the leaking system and close it. This step is key to cutting off the water. Place buckets or tarps: Put something under the leak to collect the water. It’ll help keep the damage from spreading. Create a drainage hole: For big leaks, consider poking a hole so water can escape. Make sure to place something under it to catch the water. Turn off power: If there’s danger of water reaching electricals, turn off the power. It’s safer to dry electrical items with tools, not with your hands. These steps are essential for stopping more damage and controlling a ceiling leak. Acting fast will help keep the water problem small. You’re laying the ground for effective water damage mitigation and Temporary Leak Containment. “Immediate action is essential when dealing with a ceiling leak. Stabilizing the situation and containing the water flow can make all the difference in preventing extensive damage.” Remember, aim to limit the water’s harm in your home. Following these instructions helps you get the situation under control. This is the first step towards fixing the issue. Saving a Wet Drywall Ceiling Drying Out the Damaged Area When a ceiling leak happens, the first thing to do is dry out the area well. You might need fans, dehumidifiers, or other tools. They make sure the drywall and everything underneath it are totally dry. This is important to stop mold and more damage. Water can collect in light fixtures if there’s a leak. They’re often the lowest point on the ceiling. You should find and fix the leak source before drying the area. A moisture meter can show you where the leak is by the wettest spots on the ceiling. Repairing and Restoring the Ceiling After the area is dry, remove the damaged drywall gently. You might need to cut small holes in the ceiling with a saw to find the leak. This is a hard choice and needs to be discussed and approved. Drywall repair methods depend on how bad the damage is. It’s easier to fix small water damage than big flooding. Next, check the area for mold or more damage. Ceiling restoration could mean adding new insulation, drywall, or fixing the ceiling’s appearance. The right fixing and replacement methods are crucial. They stop mold and keep the ceiling strong for years. Moisture Removal Techniques Drywall Repair Methods Ceiling Restoration High-powered fans Dehumidifiers Moisture meters Carefully remove damaged drywall Inspect for mold and further damage Assess the extent of water contamination Replace insulation Install new drywall Apply appropriate textures and finishes “Promptly addressing …

Cutting Out Moldy Drywall: Is It Necessary?

Cutting Out Moldy Drywall: Is It Necessary?

Black mold is a big health risk. It can cause breathing issues, skin problems, and extreme tiredness. If you’re a landlord and your rental property has mold, you might get in trouble. Trying to avoid that, many have gone to court, winning millions because of serious health problems from mold. This shows why dealing with mold fast and well is very important. Key Takeaways Black mold primarily grows on drywall and wood, posing serious health risks. Drywall is vulnerable to mold growth due to its composition, requiring prompt action. Cutting out and replacing moldy drywall is often the best strategy for removal. Mold remediation can be a complex process, warranting professional assistance. Addressing mold issues quickly is crucial to protect your tenants and your business. Identifying Mold on Drywall Mold on drywall looks like dark stains. You’ll usually find it in damp places such as bathrooms, basements, and laundry rooms. It can grow if the drywall gets wet from leaks or high humidity. Even if you can’t see it, mold might be inside the walls. Signs of Mold Growth There are many clues that mold might be in your walls: Discoloration or staining on the walls Deterioration of paint or wallpaper Musty or earthy odors Types of Mold Mold comes in different shapes and colors. But the kind of mold doesn’t always show how dangerous it is. Here are some common types: Black mold – Found in very wet places in homes and can release harmful toxins. White mold – Usually in cool, damp areas and may look like salt deposits. Blue mold – Likes little moisture and looks bluish-green. Green mold – Often seen as green spots in dark, moist places. All mold in your home needs quick attention. This prevents damage to your home and keeps the air safe. Cutting Out Moldy Drywall: Is It Necessary? Seeing mold on drywall often raises the question: do we need to cut it out? Whether it’s needed depends on how much mold there is and how deep it goes. Sometimes, mold is just on the surface and can be cleaned. Other times, it goes into the drywall and needs more work to fix. The Environmental Protection Agency (EPA) says if the mold is on less than 10 square feet, homeowners can handle it. But if it’s bigger or inside the wall, pros might be needed. Mold on drywall might show a big moisture problem inside the wall. This could mean cutting out and replacing the drywall is the only fix. Using bleach to clean mold on drywall is not advised by the EPA. It might not work well and could make harmful fumes. Instead, they suggest a mix of baking soda, white vinegar, and water. These should be in a 2:1:1 ratio for surface mold. For bigger problems, you might need products like Concrobium Mold Control. Remember, mold can quickly spread and be very harmful if you do nothing. It can cause breathing problems, allergies, and more. Faced with this danger, tenants have won big settlements from landlords due to health issues from toxic mold. If you think you have mold on your drywall, checking and acting fast is key. Sometimes, the mold is deeper than it looks and needs the drywall removed. Where it’s only on the surface, cleaning and adding mold-resistant paint can stop it from coming back. Deciding to cut out moldy drywall is serious and needs thought. Think about the mold’s reach and how it might harm your home’s safety and air quality. Getting advice from experts like the San Bernardino Water Damage Restoration can help make the best choice for you and your family. Removing Mold from Painted Drywall Found mold on painted drywall? The good news is, it’s usually simpler to clean than on bare drywall. The paint acts as a shield. So, the mold likely hasn’t gone very deep, making it easier to remove. First, find and fix what’s causing the mold. Stopping the moisture is key to keeping the mold away. After fixing that, you can clean the mold off painted drywall with these steps: Mix one part bleach with three parts water for a mold-killing solution. Keep the room well ventilated to avoid breathing in mold spores. Use plastic to cover and protect items near the moldy spot. Spray the mold with your solution and let it sit to work. Scrub the area with a tough brush or sponge to get rid of the mold. Make sure the wall dries completely to stop more mold from growing. If there’s a lot of mold or serious damage, it’s best to call in the pros. They’re equipped to handle big mold infestations safely. Remember, mold can be harmful. Bad removal can spread spores, making your air unhealthy and damaging your home’s structure. If you’re not sure you can handle it, or just worry, talk to a water damage and mold pro. They should check things out and help make sure the mold is gone for good. “Mold can cause dark, spotty stains, fuzzy growth, irregular colored spots, bubbling or peeling paint/wallpaper on drywall.” Dealing with mold on painted walls is key to a healthy home and strong walls. Act quickly and correctly to get rid of the mold and stop it from coming back. Conclusion Seeing mold on drywall is tough, but it’s vital to act fast. This keeps the air in your home safe and your tenants healthy. You might manage small mold spots on your own. But, if the mold is a lot, pros should handle it to make sure it’s gone safely. If you find a big mold problem, getting help from experts at Water Damage Pros – San Bernardino is wise. They know how to take out the mold, fix the damage, and stop it from coming back. This way, your rental stays safe and your tenants enjoy a healthy home. It’s key to stay ahead of mold on drywall to keep the air clean and risks low. By …