Flood Damage Restoration Tips for Crestline, CA Residents
Learn essential Flood Damage Restoration Tips for Crestline CA to protect your home and belongings. Discover expert advice on cleanup, safety, and preventing future water damage.

Learn essential Flood Damage Restoration Tips for Crestline CA to protect your home and belongings. Discover expert advice on cleanup, safety, and preventing future water damage.
Learn essential steps to handle flood damage in Upland effectively. Discover professional tips for water removal, cleanup, and restoration to protect your property and belongings.
Need immediate help with property damage? Find reliable Emergency Services Restoration Near Me available 24/7 to handle water, fire, and storm damage repairs for your home or business

Get expert answers to your Water Damage Restoration corona ca Faq. Learn about prevention, costs, insurance coverage, and professional restoration services for your property needs.
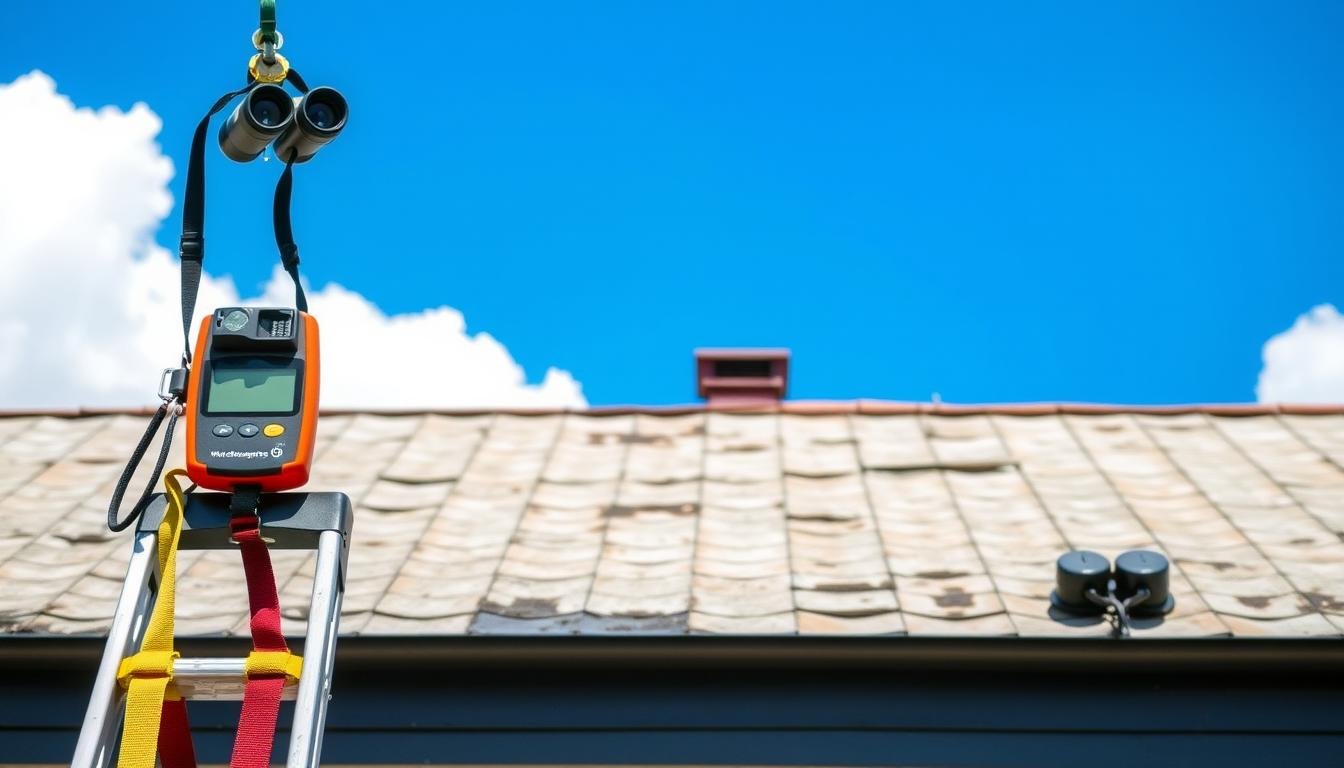
Did you know a single roof leak can cost up to $20,000 in repairs1? Your roof protects your home from the weather, but it’s often ignored until a big problem shows up. Spotting roof damage early can save you from expensive fixes or even a new roof. In this article, we’ll show you how to find roof water damage signs and keep your roof in good shape. Key Takeaways Regular roof checks are key to catching problems early1. Finding roof damage early, like missing shingles, can save your roof and avoid big repair costs1. Look out for water stains, sagging, and lots of granule loss to spot leaks and damage1. Wear the right gear when checking your roof, and do a full check inside and out1. Keep records and photos of your inspections for talks with roofers and insurance1. Understanding the Importance of Roof Inspections Keeping your roof in good shape is key to your home’s health. Regular roof inspections help spot problems early. This way, you can fix small issues before they become big and expensive2. Common Signs of Roof Damage Look out for signs like missing or damaged shingles, water stains on ceilings, sagging areas, and excessive granule loss in gutters2. Spotting these early can help you fix them before they get worse2. Tips for Roof Inspection Inspections can be done by you or a professional roofing contractor. Always use safety equipment and check both the interior and exterior of your roof. Regular professional inspections help your roof handle bad weather23. Roof Inspection Recommendations Details Frequency At least once a year, ideally twice4 Best Seasons Spring and summer, before harsh weather4 Importance in Colorado Crucial due to harsh weather conditions4 Regular roof inspections save you money and help your roof last longer. They keep your home safe and sound2. “It is recommended to have routine roof inspections to identify faults and make necessary repairs to ensure the roof can withstand severe weather conditions.”2 identify roof water damage Roof leaks can come from many sources, like damaged shingles and clogged gutters5. Knowing why your roof leaks is key to fixing it6. Once you find the leak, you can fix it and keep your home safe. Common Causes of Roof Leaks Leaks can happen for many reasons, like missing shingles7 or bad weather7. Issues with vents and flashing7 can also cause problems. DIY fixes can sometimes make things worse7. Detecting Roof Leaks: A Step-by-Step Guide Start by looking for water damage in your attic and ceilings5. Then, check the roof’s outside for signs like missing shingles7. If you can’t find the leak, try a water test with a hose6. Essential Tools and Equipment You’ll need a ladder, flashlight, and binoculars to find leaks6. Roofing cement and tarps can help fix small problems until a pro can fix it6. Performing a Water Test A water test can help find leaks you can’t see6. Wet the roof with a hose and watch for leaks inside6. This will show you where the leak is6. When to Hire a Professional For big repairs, it’s best to call a professional roofer7. They have the skills and tools to fix your roof right6. “Ignoring roof leaks can lead to substantial damage, making future roof replacement costlier.”6 By knowing why leaks happen and how to find them, you can fix your roof fast. This saves you money and keeps your home safe. Conclusion Spotting early signs of roof damage is key to keeping your home’s roof in good shape8. Look out for signs like changes in temperature affecting your roof’s strength8. Also, watch for damaged flashing that can lead to leaks8. Missing or damaged shingles can also cause water to get inside8. Regular roof checks are important to catch problems early9. Look for signs like discolored ceilings, musty smells, and structural damage9. If you’re not sure, consider hiring a professional roof inspector to keep your roof in top shape9. If you see missing shingles, water stains, or sagging areas, act fast8. Quick action and regular maintenance can help your roof last longer. This protects your home and family from water damage89. FAQ What are the common signs of roof damage? Signs of roof damage include missing or damaged shingles. You might also see water stains on ceilings or walls. Look for sagging or drooping areas and excessive granule loss in gutters or downspouts. How can I properly inspect my roof? To inspect your roof right, use safety gear. Check both inside and outside. Take photos of what you find. Also, get a pro to inspect it regularly. What are the common causes of roof leaks? Roof leaks come from many things. Damaged shingles and faulty flashing are common culprits. Clogged gutters, old roofing, and cracked chimneys also cause problems. Poor ventilation and bad installation play a role too. How can I detect a roof leak? Start by looking for water damage in the attic and ceilings. Then, check the roof’s outside. Use a flashlight, binoculars, and a hose to find the leak. You’ll need a ladder, hose, and roofing cement for this job. When should I hire a professional roofer? If you can’t find the leak or need big repairs, get a pro. A roofing contractor can fix the problem right. Source Links https://winterspringsroofingandrepair.com/2024/06/how-to-spot-early-signs-of-roof-damage-before-its-too-late/ https://www.worthyinspections.com/blog/why-roof-inspections-are-important https://www.becn.com/beaconbits/why-a-roof-inspection-is-important-for-homeowners https://bmroofing.com/importance-of-roof-inspections/ https://fitzroofing.com/signs-of-roof-water-damage/ https://www.westfallroofing.com/blog/how-to-find-a-roof-leak-and-prevent-water-damage-until-help-arrives/ https://www.iko.com/blog/how-to-find-roof-leaks/ https://whalleysfourseasonsroofing.ca/inspections/early-signs-of-a-leaky-roof/ https://tuckerroofingsystems.com/how-to-determine-water-damage-from-a-roof-leak/

Did you know things dried in 48 hours stand a better chance of being saved from damage? This fact shows how vital quick action is with water damage. Time is truly of the essence. If water damage is in your crawl space or basement, mold and costly repairs can quickly follow. To fix this, acting fast and using the right drying methods is key. It’s all about minimizing the damage as much as possible. Key Takeaways Belongings that can be dried within 48 hours have a higher chance of being saved from water damage. Using a dehumidifier can help dry out the space and belongings quickly, aiding in the restoration process. Removing water-damaged items from the affected area can facilitate a faster drying process. Proper air circulation and ventilation are crucial for effective moisture removal. Seeking professional assistance may be necessary for severe water damage cases to ensure a thorough and safe cleanup. Assessing the Water Damage Situation First, you need to figure out the water damage under your house. Find where the water is coming from. Also, check what type of damage the water has caused. Doing this helps choose the right way to fix things. Identifying the Water Source Start by finding the water’s source. This could be from leaky pipes, broken appliances, or bad weather. Knowing where it comes from helps stop more damage. Determining the Category of Water Damage Water damage falls into three categories: clean water damage, gray water damage, and black water damage. Each one needs a different cleaning method. Clean Water Damage: This is from a safe source like rainwater. It’s the least risky type and can often be fixed by you. Gray Water Damage: Comes from items like washing machines. It contains some dirt and may need help from pros. Black Water Damage: The most dangerous type comes from sewage. It’s very harmful to your health. Experts must handle it. Figuring out the source and type of water damage is key. It leads to using the right methods, which keeps you safe and reduces damage. “Understanding the water source and damage type is essential for a successful restoration.” Drying Under a House After a Leak Once the water damage has been checked, it’s time to start drying. This step includes removing excess water, improving air flow, and using dehumidifiers. Also, it involves placing desiccants to help dry the area. Removing Excess Water To start, get rid of any standing water. You can do this by hand or with special tools like a sump pump. If you need to buy one, it can cost over $100, but they rent for about $44 a day. If you act quickly, items can often be saved within 48 hours. For example, you can freeze wet books and photos. But make sure to put them in a plastic bag first to stop mold. Increasing Air Circulation Good air flow is key in the drying phase. You should open windows and doors and set up fans. Large industrial fans are especially good for drying out big areas fast. These fans can range from $50 to $500 if you’re buying. Renting them costs about $20 a day. Industrial fans dry walls, ceilings, and floors quickly and well. Using Dehumidifiers and Desiccants Dehumidifiers are great for removing moisture from the air. They come as portable units for around $270. For bigger jobs, industrial ones are available too. You can also use desiccants to soak up moisture. Silica gel and clay are common types. How long they last depends on how much they need to dry. To use dehumidifiers well, you need to watch the temperature and humidity. Also, be sure to place them in a spot where air can flow freely. Fixing water damage takes effort and time. But, hiring professionals can make it much easier. They know exactly what to do, have the tools, and reduce your worry about mold or damage. Preventing Further Damage and Mold Growth After the area is dry, it’s key to stop more damage and mold. Mold can grow in 24 to 48 hours if not cleaned up well. It often shows up as small black or white spots with a musty smell. Quick action is important because mold loves moisture and can cause health issues like sneezing and headaches. Cleaning and Disinfecting Surfaces To lessen mold danger, clean and disinfect all wet spots. A bleach solution or special mold products can help. This process kills bacteria and stops mold from spreading. Proper cleaning is extra important in bathrooms and by windows where leaks happen often. Monitoring Moisture Levels Always watch the moisture levels to avoid more damage or mold. Try to keep indoor humidity under 60%, a tip from the EPA. Dehumidifiers can make it hard for mold to grow. If the damage is bad, or you’re unsure what to do, call a pro like Water Damage Pros at 951-903-5429 or look at their website, sanbernardinowaterdamagerestoration.com. Statistic Value Time to Prevent Mold Growth 24 to 48 hours Mold Growth Time As quick as 24 hours Recommended Relative Humidity Below 60% Water Removal Rate 5-10 gallons per minute “Mold can begin to grow within 24 hours if the area is not completely dry.” Check outside your home often for pooling water which can point to a problem. If things can’t dry out, get rid of them quick to stop mold. Also, adding mold inhibitors to new drywall can help keep mold away. Doing these things to clean, disinfect, and watch moisture can stop more damage and mold. This keeps your place safe and healthy. Conclusion Drying a house after a water leak is key. It helps stop more damage and mold. Start by finding the water source fast. Then, check the damage and use good drying methods. This can save your things and keep your home solid. Always put safety first. Clean and disinfect the areas hit by water. Also watch the moisture to make sure everything dries right. If you need help, …

Did you know wet drywall can take up to three days to dry completely? Homeowners often deal with this as part of fixing water damage. This type of damage can happen from many sources, like a burst pipe or a leaky roof. It can cause issues such as mold and harm to the structure of the house. Fixing water-damaged walls is tough but needed for your house’s health. It might cost you at least $50 for small repairs. But, if the damage is bad, the price can go up fast. It may take a person over 2 hours to fix it if they know what they are doing. If the damage is big or involves black mold, it’s often wise to call a pro. The cost of professional help can vary. Yet, it’s usually a good idea for a solid and long-lasting repair. Key Takeaways Water damage can lead to a host of problems, including mold, mildew, and structural compromise. Repairing water-damaged walls can be a costly and time-consuming process, with the project cost starting at $50 for small sections. Dealing with water damage requires a thorough approach, as it can take up to three days for wet drywall to fully dry. While repairing water-damaged walls is an intermediate-level task, professional help may be necessary in certain situations. Addressing water damage quickly is crucial to prevent the issue from escalating and causing further damage to your home. Identifying and Addressing the Source of Water Damage The first step to tackle water damage is finding its source. Look out for Signs of Water Damage like loose paint, soft drywall, and musty smells. These can be hints water is getting in from outside. It might come through a leaky roof, a broken pipe, or from poorly sealed doors and windows. Locating the Leak or Moisture Source Finding where the water is coming from isn’t always easy. Water can spread far from the leak. To spot the leak, you might need to cut out damaged drywall. This gives a clearer look at what’s causing the issue. It could be a roof leak, a broken pipe, or even a dripping appliance. You need to find and fix the leak before repairing any damage. Addressing Mold Growth and Remediation If water damage goes unnoticed for too long, mold can start growing. Some molds, like “black mold,” are dangerous. Professional Mold Remediation is the best way to handle them. For small areas, you can clean the mold yourself. Just be sure to wear protective gear like gloves and a mask. Taking care of Indoor Air Quality is key for a safe home. Dealing with water damage quickly is vital. Plumbing Repairs and Home Inspections can stop the problem at the source. Sometimes, you might need experts for Water Leak Detection and Mold Remediation on complicated jobs. By fixing the main issue and any side problems, you can prevent lasting damage to your home. Repairing Water-Damaged Walls Repairing water-damaged walls starts with how bad the damage is. For small spots on the drywall, fixing it means cutting out the bad part and replacing it. Remove the damaged drywall, fit a scrap of 1-inch by 3-inch into the hole, and fasten a new piece on top. Step two is adding drywall tape and smoothing joint compound over the seams. Once that’s dry, sand and texture the area. This makes the repair invisible, blending it with the rest of the wall. If your wall has a lot of water damage, like needing a full new piece of drywall, you might want a pro to handle it. Big repair jobs are more complicated and may need special tools. Professionals will make sure it’s done right for a strong fix. Use Drywall Repair techniques for small sections of damaged drywall Incorporate Wall Patching methods to blend the new drywall with the existing wall Consider Drywall Installation for more extensive damage that requires a full sheet replacement Ensure proper Moisture Barrier techniques are used to prevent future water damage Consult professionals for complex Water Damage Restoration projects Acting fast on any water damage is key to preventing worse issues like mold. Using the right repair methods and being careful can bring your walls back to normal. It also helps keep your home safe from water damage problems in the future. “Water-damaged walls require prompt and thorough attention to prevent long-term structural issues and potential health hazards.” Preparing and Painting the Repaired Surface After fixing the drywall, the next move is to get it ready for paint. First, put a water-based primer on it. This helps the new paint stick correctly, stopping water damage. If the wall has a texture, add a matching spray texture according to the instructions. Make sure the repaired area is dry before painting. Opening windows and working in a space with good airflow is important. This makes the paint dry well and lessens any moisture problems. Choosing the right paint is key for interior walls. Pick a top-quality, waterproof paint for a good finish. Put on two coats for a full covering. Blend the paint well with the rest of the wall. If needed, use a technique for wall texturing to match the old finish. Protect yourself when applying the primer and paint. Wear a mask, gloves, and goggles. And always work in a space that has plenty of fresh air. These steps make sure your home project goes well. You’ll have your walls looking as good as new. Step Description 1. Apply Primer Apply a water-based primer/sealer to the repaired area to help the new paint adhere properly and prevent future water damage. 2. Texture the Wall If the wall has a textured finish, apply a matching texture spray according to the manufacturer’s instructions. 3. Paint the Repaired Area Use a high-quality, water-resistant paint and apply two coats for full coverage, blending the edges seamlessly with the surrounding wall. 4. Prioritize Safety Wear a mask, gloves, and eye protection, and ensure the work area is well-ventilated …

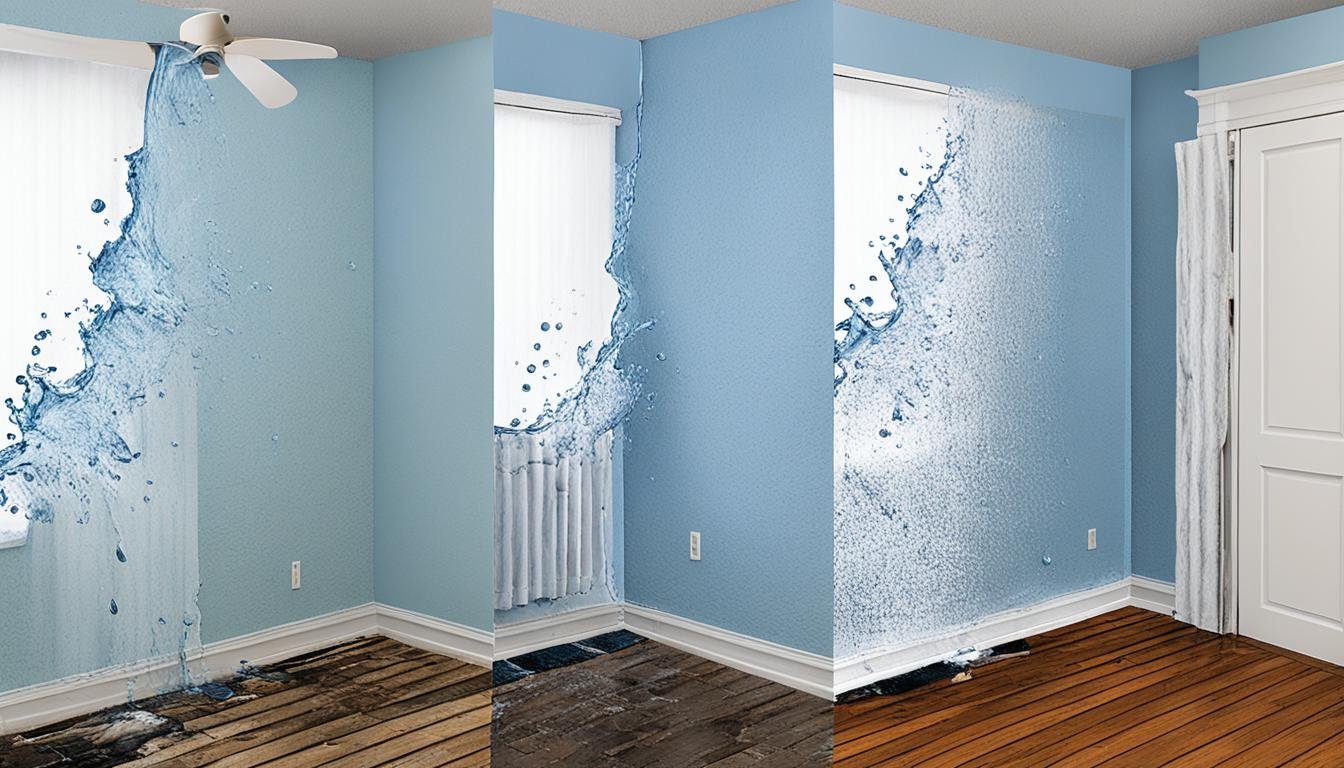
Recently, a discussion on saving a wet drywall ceiling caught the attention of 5,000 people. This highlights how common and important this issue is for many homeowners. Issues like a leaky pipe, roof troubles, or excess moisture can severely damage drywall. Yet, it’s often possible to rescue the ceiling with a smart plan and stop further harm. Key Takeaways Identifying the source of the leak is the first crucial step in addressing a wet drywall ceiling. Stabilizing and containing the leak through emergency measures can help prevent further water damage. Allowing the damaged area to fully dry out is essential before attempting any repairs or restoration. Proper drywall repair and sealing techniques are necessary to ensure the ceiling’s structural integrity and prevent future issues. Seeking professional assistance may be advisable for severe water damage or complex leak sources. Identifying the Source of a Ceiling Leak Getting to the bottom of a ceiling leak is key to stopping it and avoiding more harm. Look closely at your ceiling. You want to find any wet spots, odd colors, or water drops. These can help figure out where the water is coming from. Locating the Origin of Water Damage Check the floor, walls, and attic above. You’re looking for the rain’s entry point. Use a moisture meter if you have one. It’ll show you where the most water is. This likely marks the leak‘s location. Leaks can come from many places. Think overflowing sinks or leaky pipes. Bad roofing or full gutters are also common culprits. It takes a thorough look to find the real issue. Signs and Patterns of Moisture Intrusion Water Stains: Signal the first sight of damage, spreading if the leak continues. Peeling Paint or Wallpaper: Shows spots where water has damaged the finish. Sagging Ceiling: Reflects the weight of trapped water, weakening the structure. Mold or Mildew Growth: Tells you water has been there long enough for mold to thrive. Dripping Water: Means there’s an active leak, needing immediate action. Soft Spots: Identify areas that have absorbed enough water to feel soft or damp. Cracks or Blisters: Point to structural damage caused by water. Potential Causes of Ceiling Leaks Description Leaking Roof Missing or damaged roof tiles can let in water, causing severe damage to ceilings. Plumbing Leaks A burst pipe can rapidly damage ceilings from factors like cold weather or high pressure. Condensation Lack of fresh air can create moisture, affecting the ceiling’s strength and quality. Overflowing Gutters Clogged gutters spilling water can harm ceilings via soaked outer walls. HVAC Issues Poorly serviced heating or cooling units can leak, harming ceilings. Appliance Leaks Water leaks from appliances above may spoil ceilings in living spaces. Natural Disasters Intense weather can harm roofs or windows, letting in damaging water. Learning about ceiling leaks helps homeowners act fast to avoid more trouble. For big problems, it’s smart to get expert help. They can protect the ceiling and your home’s safety. Stabilizing and Containing the Leak When a roof is leaking, the first step is to stop the spread of water. This means acting quickly to keep the damage contained. You want to prevent as much harm to your house as possible. Emergency Leak Control Measures Once you find where the water is coming from, it’s time to act fast. You need to stop the water and start limiting the harm. Here’s what you should do: Shut off the water supply: Find the main valve for the leaking system and close it. This step is key to cutting off the water. Place buckets or tarps: Put something under the leak to collect the water. It’ll help keep the damage from spreading. Create a drainage hole: For big leaks, consider poking a hole so water can escape. Make sure to place something under it to catch the water. Turn off power: If there’s danger of water reaching electricals, turn off the power. It’s safer to dry electrical items with tools, not with your hands. These steps are essential for stopping more damage and controlling a ceiling leak. Acting fast will help keep the water problem small. You’re laying the ground for effective water damage mitigation and Temporary Leak Containment. “Immediate action is essential when dealing with a ceiling leak. Stabilizing the situation and containing the water flow can make all the difference in preventing extensive damage.” Remember, aim to limit the water’s harm in your home. Following these instructions helps you get the situation under control. This is the first step towards fixing the issue. Saving a Wet Drywall Ceiling Drying Out the Damaged Area When a ceiling leak happens, the first thing to do is dry out the area well. You might need fans, dehumidifiers, or other tools. They make sure the drywall and everything underneath it are totally dry. This is important to stop mold and more damage. Water can collect in light fixtures if there’s a leak. They’re often the lowest point on the ceiling. You should find and fix the leak source before drying the area. A moisture meter can show you where the leak is by the wettest spots on the ceiling. Repairing and Restoring the Ceiling After the area is dry, remove the damaged drywall gently. You might need to cut small holes in the ceiling with a saw to find the leak. This is a hard choice and needs to be discussed and approved. Drywall repair methods depend on how bad the damage is. It’s easier to fix small water damage than big flooding. Next, check the area for mold or more damage. Ceiling restoration could mean adding new insulation, drywall, or fixing the ceiling’s appearance. The right fixing and replacement methods are crucial. They stop mold and keep the ceiling strong for years. Moisture Removal Techniques Drywall Repair Methods Ceiling Restoration High-powered fans Dehumidifiers Moisture meters Carefully remove damaged drywall Inspect for mold and further damage Assess the extent of water contamination Replace insulation Install new drywall Apply appropriate textures and finishes “Promptly addressing …
It can take up to 72 hours for a house to fully dry after water damage. This surprising fact shows how fast and efficient actions are key when dealing with floods, leaks, or other water issues. The time to fix a home can change for many reasons. However, knowing and taking the correct steps is vital. It helps prevent big damage and ensures the water damage restoration goes well. Key Takeaways Water damage can take up to 72 hours to dry out completely Drying time depends on the size of the affected area, building materials, and other factors Prompt action within 24-48 hours is crucial to prevent mold growth and further structural damage Proper drying techniques, such as using dehumidifiers and air movers, can accelerate the process Hiring a professional water damage restoration service is recommended for comprehensive and efficient recovery Understanding Water Damage and Its Effects Water damage happens for many reasons. These can include bad weather, leaky pipes, and blocked gutters. The Institute of Inspection Cleaning and Restoration Certification (IICRC) says there are different categories of water damage. This can affect how bad the damage is and how long it takes to fix. What Causes Water Damage? Many things can cause water damage. For example: Burst pipes Leaking pipes or drains Sewer or storm drain backups Severe weather conditions, such as heavy rain or flooding Malfunctioning appliances, such as washing machines or dishwashers Types and Categories of Water Damage The IICRC classifies water damage into three types: Category 1 (Clean Water): This is the safest type, coming from sources like clean water lines. Overflows from tubs or rain leaks are some examples. Category 2 (Greywater): This water could have chemicals and bacteria. It can cause mold to grow quickly and makes it harder to clean and dry. Category 3 (Blackwater): The most dangerous type, with sewage and harmful bacteria. Cleaning this water is difficult and very hazardous for people working on it. The type of water damage and how much damage there is affect how hard it is to fix. Getting started quickly is key to stopping further harm. Water can keep damaging a home even an hour after it first enters. Category Description Category 1 (Clean Water) Originates from sanitary sources like broken water supply lines, with examples including overflowing bathtubs and rainwater damage. Category 2 (Greywater) May contain chemicals and bacteria, accelerating mold growth and complicating decontamination and drying processes. Category 3 (Blackwater) The most hazardous, with contaminants like sewage and bacteria. It requires extended decontamination work and presents the most significant hazard to residents and contractors. Quick and effective action is vital to prevent more damage. If you’re in need of water damage restoration in San Bernardino, check out with sanbernardinowaterdamagerestoration.com or contact the Water Damage Pros. House Drying Duration After Water Damage Dealing with water damage in your home is tough. The time to dry a house out is really important. How long it takes depends on many things. Knowing what these are will help you plan better for fixing the damage. Usually, a room-sized area takes about 72 hours to dry completely. But, if the water damage is big, it might need 10 to 14 days, or even more. The size of the wet area, what materials are wet, and how you dry it all matter. To dry things faster, we use air drying, powerful fans, dehumidifiers, and special equipment. The goal is to dry everything out quickly. This stops more damage and prevents mold. Drying can be quick, in about a week, for fresh water damage. But, if the damage is old or really bad, it could take 2 to 4 weeks, or even longer. The type of water, how bad the damage is, and if we can get to all the wet places, affect how fast we can dry things. The time to dry a house after water damage has many factors. It’s important to get help from a trusted water damage expert, like sanbernardinowaterdamagerestoration.com or Water Damage Pros. They will make sure the drying and repair go well and quick. Water Damage Severity Drying Timeline Rebuild Timeline New water damage 3-7 days 1 to 30 days Week-old water damage 10-14 days 1 to 4 months Month-old water damage 2-4 weeks 4 to 12 months Extreme water damage 4-6 weeks 12+ months Remember, the time it takes to fix water damage can change. It depends on different things, like the problem itself, what the building is made of, and the tools we have. It’s smart to team up with a water damage expert for a fast and good fix. “The drying process is a crucial step in the water damage restoration journey, and understanding the timeline can help you better prepare and manage your expectations.” Conclusion It’s vital to deal with water damage fast and well to stop further problems. Knowing about what causes water damage, the types, and the drying methods helps a lot. This way, homeowners and experts can team up. They can work to lessen how long fixing things takes. To get your home fixed quickly and well, using the right methods is key. This is where companies like Water Damage Pros – San Bernardino come in. Acting fast, using good drying methods, and truly grasping the problem are key to a good fix. No matter if it’s a small leak or a big flood, acting quickly is a must. Working with certified experts and doing things the right way can save your home, stuff, and your family. It helps after any water disaster. FAQ How long does it typically take to dry a house after water damage? It usually takes anywhere from a few days to a few weeks. This depends on how much water has come in. The time needed is hard to predict. It’s all about the amount of water, what kind of damage, and what gets wet. What are the different categories of water damage? Water damage is split into categories by the …

Over half (54%) of property owners across Europe have faced water damage. It shows how crucial it is to know about wall drying time after a leak. Causes like a burst pipe, faulty appliance, or a natural disaster can really harm your space. They can lead to serious structural and financial issues if not handled quickly. The time it takes to dry a place can fluctuate a lot. It can be from several days to several weeks. This big difference emphasizes the need to use the right drying methods. It’s also key to understand what affects how long the restoration takes. Key Takeaways Over half of property owners have experienced water damage at some point Drying time can range from several weeks to several days depending on the situation Proper drying techniques and understanding key factors are crucial for a swift restoration Professionals can identify hidden areas of water damage and use specialized equipment for efficient drying Mold can start growing in as little as 24 hours, making prompt action essential Understanding the Factors Affecting Wall Drying Time Several important factors impact how long it takes for walls to dry after a leak. The extent of the damage and the drying technique used play huge roles. They can make the drying process shorter or longer. Extent of the Damage The amount of water damage really affects how quickly walls dry. If lots of water gets into the drywall, it will need more time to dry. For thoroughly soaked drywall, drying completely can take a very long time. Restoring flood damage is usually much more time-consuming than fixing mild water damage from a leak. Drying Technique Drying wet drywall fast is crucial, and there are many ways to achieve this. Using only one method can be slow. Combining several drying tools like dehumidifiers and air movers removes more moisture. This also helps stop mold growth. Opening windows and doors for better airflow is helpful too. Experts stress the importance of quickly addressing water leaks to reduce damage. Restoration professionals use top-notch industrial-grade equipment for water extraction and drying. This ensures walls are thoroughly and quickly dried. “On average, it takes about 72 hours for areas affected by water damage to completely dry up.” Regularly checking your home can catch early signs of water damage. This allows you to take steps to prevent damage before it worsens. Wall Drying Time After a Leak Water damage drying time is crucial for avoiding problems like mold and weakening structures. It roughly takes 72 hours for a spot to fully dry out. But remember, larger areas hit by water damage need more time. After water damage occurs, quick action is essential. Get rid of soggy materials. Then, set up drying equipment to get air moving, like fans and dehumidifiers. You also should work with a water damage restoration expert. They have the gear and knowledge to quickly dry your walls. How long it takes to fix water damage depends on a few things. The home’s size, how fast the leak was stopped, and the materials used all matter. Generally, bigger wet spots need more time to dry. Statistic Value Average cost of repairing drywall after water damage $500 (typical range: $250-$750) Time to completely dry wet drywall after a water leak 3-5 days Moisture meter reading indicating wet drywall Above 12% Timeline for mold growth to start after water damage 24 hours For drying walls effectively, professional gear like air movers and dehumidifiers are key. Such equipment is usually available for rent at hardware stores. Before you start drying, it might be necessary to cut your walls. This lets them dry faster. Sealing off the room as it dries can make the process work better. Use plastic sheeting over openings. This approach, along with experts helping, ensures your walls dry well. It also stops further damage. Conclusion Drying out walls after a water leak is vital to stop more damage and mold growth. The Wall Drying Time After a Leak method looks at how bad the damage is, what drying methods are used, and when repair is complete. Experts, like Water Damage Pros in San Bernardino, use special gear and methods to take all moisture out. This improves the air in your home and keeps your house strong. Getting rid of moisture removal from walls using the right wall drying techniques is key. This keeps mold away, which is important for your health and home. Water Damage Pros use powerful air movers, dehumidifiers, and cameras to dry spaces fast and watch the progress. Sticking to the right leak remediation timeline and controlling humidity levels for wall drying is crucial. Doing this helps reduce water damage effects and keeps your home safe. If you need help with wall insulation drying, or want top-notch drying equipment for walls, Water Damage Pros in San Bernardino can help. They’ve got the skills and tools to get your home back to normal. FAQ How long does it take for drywall to dry after a leak? The time for drywall to dry depends on how much water it absorbed. Drywall takes longer to dry if it soaked a lot of water. Flood damage needs more time to fix than small pipe leaks. What are the best methods for drying out wet drywall? It’s key to dry wet drywall fast. Use dehumidifiers and air movers for quicker drying. This helps prevent mold and speeds up the process. Opening windows and doors also aids air circulation. How long does it typically take for a water-damaged area to fully dry out? An area usually dries up in 72 hours. But larger water-damaged spaces take longer. You must follow certain steps to restore your home after water damage. What other steps are involved in restoring a water-damaged property? Drying wet areas is the first step, but not the only one. Sanitizing is crucial to stop mold and remove harmful stuff. Water Damage Pros in San Bernardino use top equipment. They make sure every place …